


 Facebook Community
 Change Log
 Help Center


How to Add a Background Image to Your Shopify Store
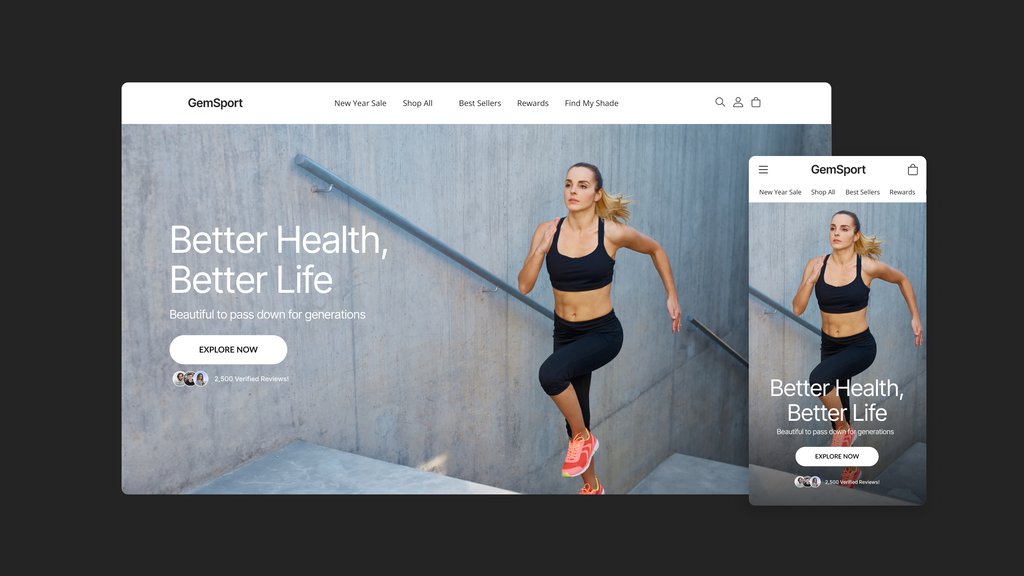
The visual appeal of your Shopify store can make a significant difference in attracting and retaining customers. One effective way to enhance the aesthetics of your store is by adding a background image. In this article, we'll explore how to add a background image in your Shopify store to create a visually captivating online presence.
Before diving into the customization process, let’s first discern the disparity between Shopify themes and background images.
In Shopify stores, the theme is a template for your entire website. It defines how your store looks and feels to customers, including styles, layouts, blog menu, images, interactive elements, cart, and checkout features.
Now, imagine the background image as the paint that adds personality and style to your shop.
So, the main difference is the theme lays down the groundwork, while the background image gives your shop its unique flair. It's the backdrop that sets the mood and tells your brand's story.
In essence, while the theme builds the structure, the background image adds the personal touch. Both the theme and the background image can team up to make your Shopify store stand out and create a visually appealing and memorable shopping experience.
Learn more: Shopify Product Images: A 10-minute Guide for Beginners (2024)
Checklist for the Best Background Image for Shopify Store
To ensure your background image effectively enhances your store's visual appeal and reinforces your brand identity, we'll provide a checklist of considerations. This checklist will cover aspects such as image quality, relevance to your brand, compatibility with different devices, and more.
Learn more: The Ultimate Shopify Image Size Cheat Sheet
-
Aesthetic and Brand Alignment
Consistency with Brand Identity: It’s essential that the image aligns with your brand color, style and message. Through the image, viewers can hear your store’s tone of voice and personality.
High Image Quality: High-resolution images are essential for your Shopify store's background to ensure a professional, appealing look, avoiding the graininess of low-resolution images.
Minimalism: Simplicity should be considered. Avoid choosing images that are too cluttered or have too many toppings to avoid distracting from the product. Contrast is also important, because your eyes tend to be attracted to things that are sharp.

- Optimized Image Files
Fast Loading Times: File format selection is crucial. There are different image formats you can consider, which are depending on your purpose. Optimize the image size to balance quality and loading speed. Use appropriate file formats:
- JPGs are suitable for images due to their ability to maintain quality while keeping file sizes small, thereby reducing loading times.
- PNGs are ideal for graphics with large or flat color areas, like designs, infographics, text-heavy images, and logos. They support transparent backgrounds, perfect for logos. Saving PNGs in "24-bit" format ensures better quality and a broader color range.
- Another optimized version of the two above is WebP. This format offers superior compression specifically designed for web images, with an average file size reduction of over 30% compared to traditional formats like PNG and JPEG.
Responsive Design: Ensure the image looks good on all devices (desktop, tablet, mobile). Test how the image scales and crops on different screen sizes.

Moreover, the size of image files also matters. Larger files means slower loading speed, causing a significantly poor user experience. According to data shared in a recent Aberdeen Group study, a one-second delay in page load time can lead to a 7% decrease in your conversion rate. So, don’t underestimate any image here. It can cost you customers!
Learn more: Shopify Image Optimization: 11 Easy Ways
-
Practical Aspects
Licensing and Rights: Ensure you have the legal right to use the image (purchase from a reputable stock photo site or use your own). Verify any usage restrictions associated with the image.
Cohesiveness with Other Elements: Make sure the background image works well with your site's layout, including headers, footers, and sidebars.
How to Add a Background Image to a Shopify Page
To begin, you'll need to upload the background image on your website. This process involves utilizing the file storage provided by your Shopify store.
Step 1: Start by accessing your admin page and then proceed to Content > Files.

Step 2: In the upper right corner, select Upload Files and proceed to upload the desired image.
Step 3: Ensure you keep the link to the selected image accessible. It's advisable to either keep this tab open or save the link for future reference.

From now, we will guide you how to use this image to set it as background for the whole page and for an individual section.
How to Add a Background Image to the Website's Body
Step 1: Access your Shopify admin, then proceed to the Online store > Themes > Actions > Edit code.

Step 2: Select Add a new snippet and generate a snippet named precisely: yourstore-background-image.

Note: Ensure to replace "yourstore" with your actual store name.

Step 3: Insert the provided code into this newly generated file.
|
<style> html, body, [id*='shopify-section']:not([id*='announcement']):not([id*='header']):not([id*='footer']), [id*='shopify-section']:not([id*='announcement']):not([id*='header']):not([id*='footer'])> [class*='background']{ background: url("replaceme.jpg") !important; background-size: cover !important; } </style> |
Step 4: Substituting the placeholder text "replaceme.jpg" with the previously copied image URL and hit Save. Ensure to enclose the URL within quotation marks.


Step 5: Locate the theme.liquid file.

Step 6: In the theme.liquid file, utilize the CTRL + F function to search for: <body.
Note: This method only works with adding a background image to the body and all sections except the header, announcement bar, and footer.
Step 7: Directly below the identified line, insert the provided code: {% include ‘yourstore-background-image' %}
|
<body class="gradient {% if settings.animations_hover_elements != 'none' %} animate--hover-{{ settings.animations_hover_elements }}{% endif %}"> {% include 'yourstore-background-image' %} |

Step 8: Preview the page and hit Save when you're happy with it.
- If this method does not work, refer to the subsequent section where we discuss adding an image to an individual section.
- Remember to remove the line “{% include 'yourstore-background-image' %}” from the theme.liquid file if it's not being utilized. Optionally, you can delete the "yourstore-background-image" file as well, but deleting solely this line ensures no adverse impact on the website's performance.
How to Add a Background Image to a Section
Let's proceed to incorporate a background image into an individual section. Here's how:
Step 1: On the top left of the edit code page, click on the three dots and select Customize theme.

Step 2: Choose the specific section you wish to enhance with a background. For example, I'll demonstrate adding a custom background to the Featured Collection section.
Step 3: Scroll to the bottom of the page until you locate “Custom CSS”.

Step 4: Paste the provided code below, ensuring to substitute "replaceme.jpg" with the URL of your desired image:
> * { background: url("replaceme.jpg") !important; }.
You will see the background image appear on the screen. Check if the image match your store style, hit save and publish the page.

How to Add a Gradient Background to Shopify Section with GemPages
Another way to impress your visitors is by enhancing the visual appeal of the Shopify store. Owners often seek to add gradient backgrounds, a task that typically demands coding skills when using the Shopify Theme Editor.
- A gradient background is a background that transitions smoothly between two or more colors, creating a gradual blend or progression of hues. In a gradient, colors change gradually from one side to another, building a visually appealing and smooth transition.
However, a simpler alternative can be easily achieved with GemPages, Shopify's top-rated page builder. With GemPages, creating captivating gradient backgrounds is both swift and effortless, eliminating the need for any coding expertise.
Walk through this article to master the way of adding a Gradient Background to GemPages’ Elements: How to add color gradient button to Shopify sections created with GemPages
Conclusion
Adding a background image to Shopify page store is a simple yet effective way to enhance your store’s visual appeal and create a memorable online shopping experience for your customers. By following the guidelines outlined in this article, you'll be well-equipped to select and add a background image that perfectly complements your brand and elevates your store's overall design.
Meanwhile, with GemPages, you have the added capability to transform your background into stunning gradient designs, adding an extra layer of eye-catching style to your store. Why not install GemPages now and explore a plethora of storefront customization options?
FAQs about Shopify background image


