


 Facebook Community
 Change Log
 Help Center


- What Is Product Photography and Why Is It Important to Your eCommerce Store?
- Equipment Needed to Take Fantastic Shopify Product Images
- Setting Up Your Own Studio
- Shooting Product Images
- Retouching Product Images
- Optimizing Product Images for Shopify
- Five Popular Types of Shopify Product Images and Examples
- Wrapping Up
- FAQs about Shopify Product Images


Shopify Product Images: A 10-minute Guide for Beginners (2025)
Here's a hard fact: Web users are very quick to judge. They form their first impressions about a website in the blink of an eye (literally), and that tiny fraction of a second is likely to determine whether they will stay or not.
Here's another fact: Human brains are wired to respond to great visuals and can process them 60,000 times faster than text!
So perhaps the lesson to be learned here is that for Shopify store owners, having killer Shopify product images is key to keeping visitors hooked and engaged with their businesses.
However, hiring a professional photographer can be very expensive.
The alternative is to let your DIY spirit take the wheel. In fact, producing an attractive product image for Shopify is not a tough nut to crack once you master the basic how-tos.
What Is Product Photography and Why Is It Important to Your eCommerce Store?
Product photography is essentially for showcasing the unique selling points (USP) of your products. It allows your customers to gain a better idea of what they should expect when they are not able to examine the products themselves.
A good product image can work wonders for your Shopify store because they:
- Enhance your brand credibility: High-quality pictures often suggest high-quality products. They induce a favorable impression of your brand and therefore help you win more trust from your customers.
- Improve your sales: Over 90% of online shoppers base their purchasing decisions on the product photos they see. Indeed, compelling product imagery can result in growth of up to 30% in conversions.
- Have social shareability: It is easier for a product image to go viral on Pinterest or social networks like Facebook or Instagram as opposed to text-based product descriptions.
Equipment Needed to Take Fantastic Shopify Product Images
1. Camera
While a full-frame sensor DSLR camera seems like an ideal option, you can start with whatever you have at hand, be it a point-and-shoot camera or your smartphone. Shopify suggests a mobile phone with a 12-megapixel camera or more.

2. Tripod
It is not a compulsory investment, but if you have one, you can avoid a shaky camera and keep your photo angles consistent.
3. Lighting
Good lighting can make a huge difference to the image quality. Here’s a basic pros-and-cons list of the two most commonly used types of lighting.
| Natural light | Studio light | |
| Pros |
|
|
| Cons |
|
|
| Tips |
|
|
Notes:
[1] The main light on a set
[2] The added light to fill in the shadows around the subject
4. Shooting table
It’s easier to shoot your products when they are on a table. With a table width of around 24-27 inches, you are given an adequate amount of comfort positioning and shooting your product.

5. White background
A white background will make your photos easier to edit. You can either use a long roll of white sweep (a curved piece of paper that provides a seamless background) or a poster board as a much cheaper alternative.

6. White bounce cards
These eliminate strong shadows and help you take crisp-looking photos that capture every detail of your products in their best light. You can use foam boards as bounce cards which can be found at any office supply store.

7. Duct Tape
You need some rolls of tape to keep the backdrop in place and secure your products during your shoot.

Setting Up Your Own Studio
After assembling all the equipment, it’s time to set up your DIY home shoot.
1. The equipment
Place the foldable table right next to the window to have the natural light as side lighting for your set. This will bring out the shape and texture of what you shoot later.
Unwind your white sweep, attach one end to the wall or ceiling, then let the rest fall on the table. Use tape to secure the background to the table to ensure that things don’t move around throughout the shoot.
Mount the bounce card vertically on the other side of the table and opposite the window. This white board will reflect the sunlight onto your product and minimize unwanted shadows.

- Position the table as near as possible to the window, but remember to give yourself enough space to move around your set in case you want to shoot the product from different angles.
- Avoid placing your set in direct sunlight as the light can be too harsh.
- Make sure the bounce card is at least as large as your subject so that the bounced light fills the shadows entirely.
2. Your product
As simple as it appears, styling your product can take quite a lot of trial and error to reach a sweet spot.
Before anything else, you have to clean it and get it ready for the shoot. If you are going to photograph a pair of shoes, then don’t forget to remove the scuffs and stains before placing them on set. If you are shooting an item of clothing, make sure you give it a good iron and get out all the creases. If you put meticulous care and attention into the preparation stage it will save you tons of work later.
Now lay your product down in the middle of the table and against the white backdrop. You can make some tiny movements here or there or use certain props to add more dimensions to the frame. For example, some stiff foam cubes could take your jewelry photoshoot to the next level if used strategically. They can not only make your photos look more 3D by holding the pieces up and creating more distinct shadows, but they also help to bring your store a sculpture-like, classic glamor.

- Keep everything steady and in order by using glue or tape, especially for small items such as rings or lipsticks.
- For clothes, pin the garment to the model or mannequin to ensure it fits properly.
- Try presenting your product in an Instagrammable flat lay – a style of photography in which objects are creatively laid out on a flat surface and shot from above – You can rarely go wrong.
Need more inspiration? This video is a great place to start.
Yet however creative your photos might seem, always bear in mind that the primary purpose of the whole shoot is to sell the product. That’s why most Shopify stores opt for the classic choice of products centered against a plain white background. If you want to add a more lively charm to your photos by using props or colorful backdrops, then do so in moderation to maintain the emphasis on your product.
Shooting Product Images
Expecting perfect photos straight away is unrealistic. Take as much time as you need to feel comfortable with the gear, experiment with different angles and positions, and develop your own best practice! Remember to check the focus regularly– there’s nothing more frustrating than thinking everything is on the right track just to find blurry images afterward.
What you should aim for is to produce photos that give your customers a realistic sense of what your product is like, as if they are viewing it at a brick-and-mortar store. In other words, make their secondhand experience feel like it’s actually firsthand!

- Take a minimum standard of 4-5 shots from various angles–consumers need to grasp a comprehensive view of your product to decide whether they should open their wallets.
- Never underestimate the art of lighting: Reposition the bounce card between shots until you are satisfied with the result.
- Pause your shooting every once in a while and view the pictures on a computer screen instead of the camera screen to see how they look.
Retouching Product Images
Even when your photos look generally acceptable, you should never skip the editing process. This step is crucial to ensuring consistent image quality throughout your photo series, which can earn you extra points in the professional department.
If Photoshop is too complicated for you, here are some beginner-friendly alternatives that can perform equally well.
- Canva: This tool is available on both desktop and mobile browsers. Canva makes it very easy to add effects to the images and to optimize them for different social media platforms.
- Pixlr X: This photo editor includes many features similar to Photoshop. It allows you to download images without a watermark, and is free and easy to use.
- Picsart: This app gives its users a lot of flexibility in making collages, adding stickers, and creating frames.

There are also a couple of aspects you should watch out for when retouching your product images.
- Sharpness: By making the edges in your photos more clearly defined, you bring a sharper focus and more clarity to your products.
- Brightness: While adjusting brightness is a quick way to fix dark images, you certainly don’t want to go overboard with it, or the lighter parts in your photos will turn white.
- Contrast: Increasing contrast in the right spots will accentuate the texture of your images and add more depth to your products.
- Color saturation: If adjusted properly, your pictures will appear more rich, vivid, and dynamic, which catches the eye and arouses excitement.
Optimizing Product Images for Shopify
1. Shopify product photography requirements
|
Images |
3D models |
|
|
Size |
|
File size: Up to 500 MB |
|
Image formats |
|
|
|
Recommendations |
|
3D model files larger than 15 MB will be optimized by Shopify in terms of visual output and loading speeds |
2. Best practices to optimize product photos for your Shopify online store
- Reduce the image size
Shopify allows your product images to be as big as 20 megapixels. It is, however, not advisable to go to that end of the size spectrum as this can affect the loading time of your page and may not adapt well to mobile screens.
That said, don’t use images under 800 x 800 pixels either, as your viewers won’t be able to zoom in on the details of your product.
- Make your product photos stand out
Try using your product images as ads. Add a badge, some brand/feature icons, or even a CTA to attract attention and foster customer engagement.
- Optimize your alt text, captions and image file names
Putting some extra work into these aspects will make it easier for Google to crawl your images and connect you with interested shoppers. Since Google cannot read your images, make sure to give every image on your website a concise and descriptive file name, alt text and caption, with keywords included (if possible).
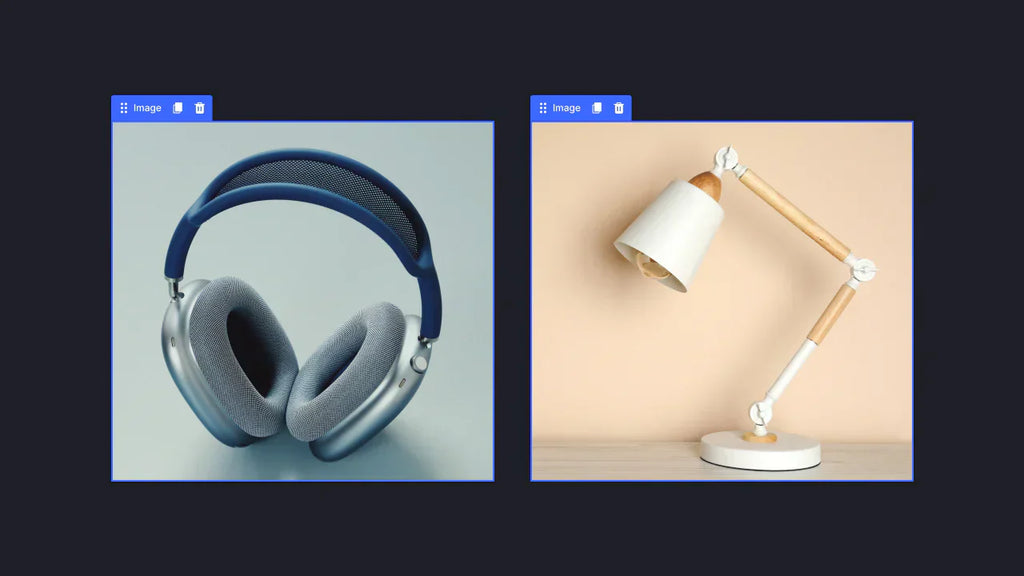
Five Popular Types of Shopify Product Images and Examples
1. Close-ups
- Purpose: Put a spotlight on the unique details that make you proud of your product. Tons of work has been dedicated to how your product looks, so never miss the opportunity to show off the nitty gritty that a traditional image might fail to capture.
- Best used for: Tiny and delicate decorations like jewelry and sophisticated stitches, or special features like ergonomic textures.
- Example:

ELEGOO is a tech company that develops and sells 3D printing kits.
In this close-up, ELEGOO shows the intricate details of its cutting-edge extrusion design that allows for higher printing accuracy and stability compared to ordinary 3D printers.
2. Group shots
- Purpose: Show many products at once, either as variations of the same product or a combo of related offerings. Grouping is convenient for your customers to make comparisons or gain helpful suggestions from just one single image.
- Best used for: Collections like sneakers and clothing, or combos like necklaces and earrings.
- Example:

Amazfit is one of the leading smartwatch and fitness tracker brands in the US. They deliver their unique style of fusing fashion and technology through their website, using GemPages.
To pique the shoppers’ interest in their latest collection, Amazfit displays their ultra-slim watches in a futuristic-looking group shot.
3. Lifestyle photos
- Purpose: Provide context for your product so that customers can better estimate the size and, more importantly, imagine how the product will make an impact on their personal life. For instance, pictures of a sought-after sticker being put on a phone case, a helmet, or a car bumper.
- Best used for: Virtually everything - from food, fashion, and household appliances to real estate!
- Example:

Longchamp’s official distributor in Indonesia chose GemPages to build different pages for their website, to preserve the luxury vibe of their world-class leather goods.
Nothing works better than a lifestyle shot when it comes to fashion. In this photo, Longchamp features a casual chic look with their bag placed next to an outfit of the same pattern in a public, non-luxury space.
4. Packaging shots
- Purpose: Increase brand awareness and make your product a special gift. If you have green or gorgeous packaging, don’t hesitate to devote at least one image to it! This is a subtle yet captivating way to tell your brand story and values without a single word.
- Best used for: Cosmetics, luxury items like purses and watches, gift sets.
- Example:

The Body Shop Philippines celebrates the brand’s values of self-love and vegan-friendliness in a minimal page design created by GemPages.
This photo demonstrates how the gift set seems like the perfect treat for those who pursue green living, with the highlight being the gift case, which uses sustainable material and can be reused for different purposes.
5. 3D model/360-degree photos
- Purpose: Display your product in its full glory. Shoppers can rotate and view your product from all sides by dragging the mouse or doing finger swipes. This type of product photography has excellent appeal. For Shopify sellers, to display your 3D models in your online store, you need to add them to Shopify Admin first. Then you can use apps like GemPages Powerful Page Builder to incorporate those models into your product page without any prior coding experience.
- Best used for: Any product you want your customers to have fun interacting with!
- Example: You can see how lively a Shopify store can be with a 3D model and learn to step up your product display game by watching the video below.
Wrapping Up
In a crowded landscape of over 1,750,000 merchants worldwide on Shopify, every seller is screaming for attention. High-quality Shopify product photography plays a crucial role in helping you rise above the digital noise.
Of course, producing flawless product imagery from the get-go or achieving ambitious revamp goals within just a few days is out of the question. We all know it takes an awful lot of practice and hit-and-miss attempts to become a success.
Nevertheless, once you get the hang of how product photography works, you will be able to snap a stunning product image, build a strong brand identity, and have a solid foundation to go places in the eCommerce world.
FAQs about Shopify Product Images


![Shopify Flow — The Complete Guide on Shopify Workflow Automation, Templates & Examples [2026]](http://gempages.net/cdn/shop/articles/Shopify_flow_-_thumbnail_1_7ae9e33a-0ea2-4fae-822d-0e81bb1bba5c_480x480.png?v=1780040989)


