


 Facebook Community
 Change Log
 Help Center


How to Add Social Media to Shopify Stores for Beginners (2026 Updated)

Are you looking to boost your Shopify store's visibility and sales?
Try adding social media to your Shopify store. Connect popular platforms like Instagram, Facebook, and TikTok to your site for increased brand awareness, stronger customer relationships, and boosted sales.
But how to add social media to Shopify? In this guide, we'll walk you throughintegrating social media into your Shopify store. Let's get started!
Why Should You Add Social Media to Shopify?
Connecting social media platforms like Instagram, Facebook, and TikTok to your store will provide many benefits.
- Increase brand awareness - Adding social media icons to your Shopify store allows your visitors to follow your social media accounts and you to stay connected with them even after they leave your website.
- Give customers a way to interact with you - Thanks to its ability to receive live feedback and facilitate discussions, social media can help you foster relationships with your customers and gain their insights.
- Build trust and credibility - A solid social media presence and active engagement with your audience can help you earn trust and boost your business’s credibility.
- Improve customer satisfaction - Customers have a faster and more convenient way to ask support-related questions. Instead of navigating away from the website to find contact information, they can directly ask questions or provide feedback through social media.
Learn more: 12 Brand Building Tips Shopify Store Owners Need to Know
Where to Place Social Media Icons on Your Store?
Some common places where you can strategically add social media icons on your Shopify store are:
Footer - Adding social media icons to the footer keeps them visible throughout the browsing experience. As you can see in the picture below, BottleTop makes its social share buttons count by placing them at the bottom right of the website.

Adding social media icons to the footer keeps them visible throughout the browsing experience
Product pages - Adding social media icons to product pages is a great way to encourage visitors to share your products with their network, just like Share Music does.

Adding social media icons to product pages encourages visitors to share your products with their network
Blog posts - If you have a blog, you can add social media icons to individual blog posts. This is a great way to encourage visitors to share your content with friends and followers.

GemPages’ places social media icons at the bottom of blog posts to trigger content sharing
How to Add Social Media Icons to Shopify?
There are two main methods to add social media icons to your Shopify store:
- Using Shopify Theme Editor
- Using Third-party Apps
Method 1: Add Social Media Icons Using the Shopify Theme
For most Shopify themes, you can easily add social media icons to the footer using the Shopify Theme Editor. If you want to place these buttons in other positions such as a product page or a blog post, you will need technical expertise to edit code.
In this blog post, we will only focus on how to add social media icons to the footer.

Step 2: On the Theme Editor, select the Theme Settings icon at the top left sidebar > Scroll down to the SOCIAL MEDIA section.
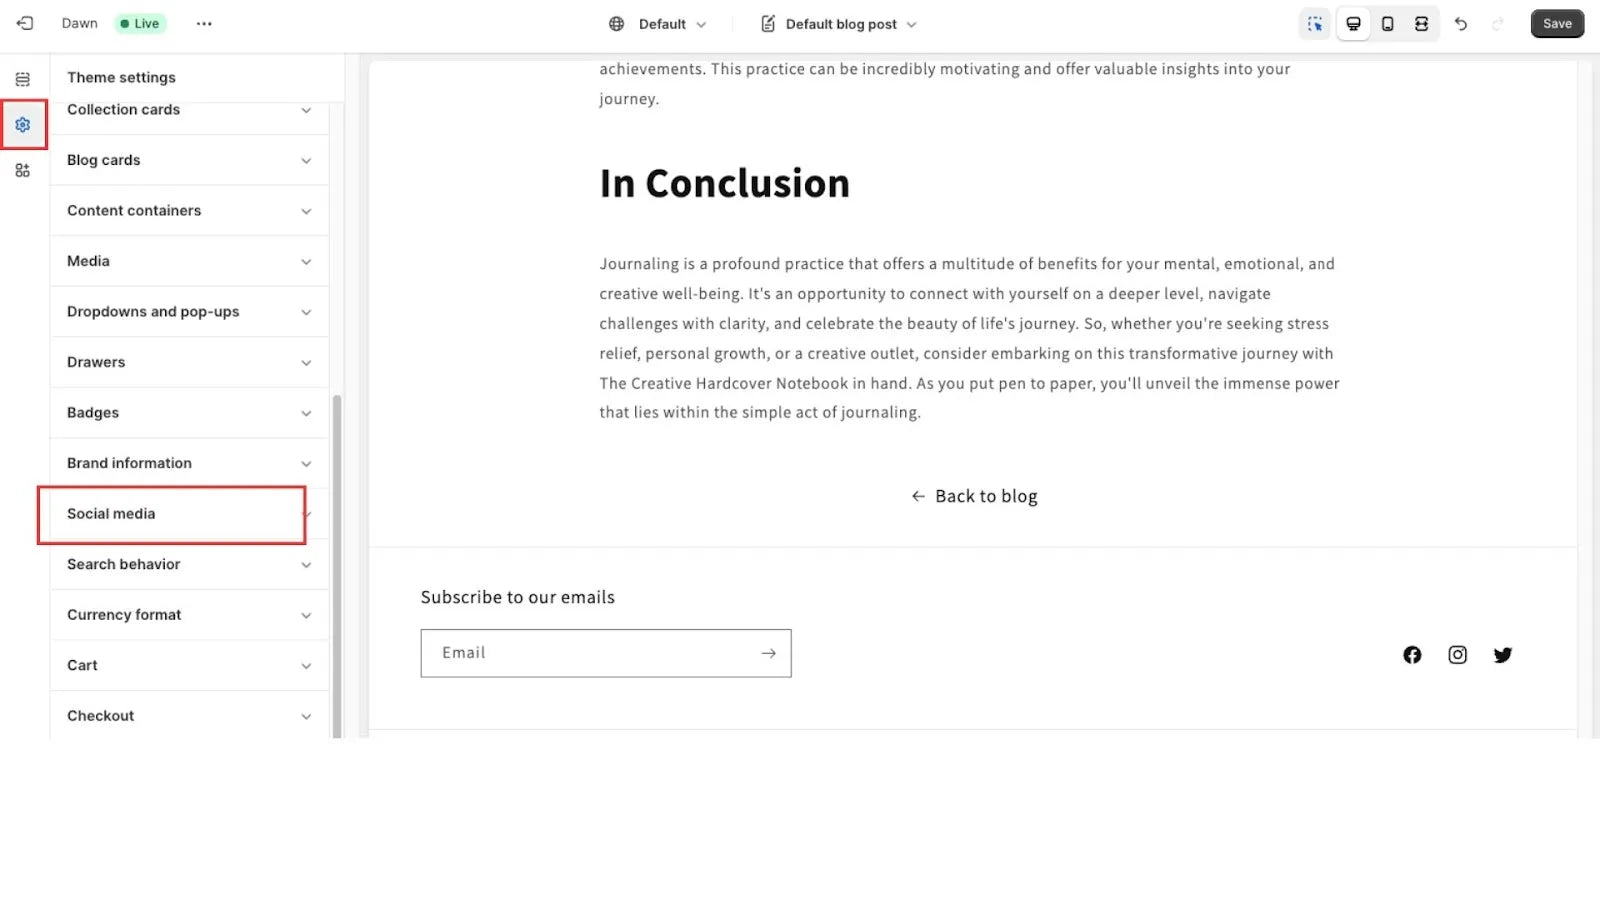
Step 4: Add social media links to Shopify.
Simply add links to your social accounts to the box. As you can see, there are many social media channels that you can add to your Shopify footer including Instagram, Facebook, Youtube, TikTok, Twitter, and so on.

Step 5: Hit Save and check the result in the live view.

Method 2: Add Social Media by Using Third-party Shopify Apps
Most Shopify themes have a footer section in the Editor where you can directly add social media icons. However, if you want to place social media icons in other positions without coding, you can turn to third-party apps.
Genuinely, if you are using a page builder like GemPages, you can easily add social media buttons to Shopify without any coding skills. All you have to do is drag and drop the social media element to your desired positions.
In the example below, GemPages is used to create a product page that includes social media buttons.
Step 1: Go to the Shopify App Store > Install GemPages.

Step 2: From the Shopify Admin, head to the Apps section > Choose GemPages Landing Page Builder.

Step 3: From the GemPages Dashboard, select the page you want to add social share buttons.

Step 4: Once you access the Editor, on the Element tab, scroll down to the Booster section > Drag and drop the Social Share element into your desired position. You can also customize the social share buttons by editing text, color, background, and URL within the Editor.

Step 5: Hit the Publish button.
Note: You can only add social share buttons to Shopify pages created by GemPages.
Top Social Media Share Button Apps: Must-Have Shopify Social Media Apps
Below are some of the most popular Shopify social media apps available on the Shopify App Store. These tools do more than simply add share buttons. They help you customize button styles, control placement, and understand how your content is shared across different social platforms, making it easier to choose the right solution for your store.
Elfsight Social Share Buttons
Elfsight Social Share Buttons help expand your store’s visibility by allowing visitors to share content with a single click. By making sharing effortless, you can reach new audiences, attract more traffic, and potentially support your SEO efforts. Elfsight also offers a free trial so you can test its impact before committing.
Key features:
-
Wide platform support: Add share buttons for up to 40 social networks.
-
Flexible placement: Display buttons inline or as floating elements for better visibility.
-
Custom styling: Adjust colors, shapes, and layouts to match your brand design.
ShareThis Share Buttons
ShareThis lets you add modern, visually appealing share buttons to your Shopify store or blog. It supports popular platforms such as Facebook, WhatsApp, Twitter, and Pinterest. The app has solid user ratings and offers a free plan, making it accessible for beginners.
Key features:
-
Sticky visibility: Keep share buttons fixed on the screen as visitors scroll.
-
Full design control: Customize size, color, alignment, and placement.
-
Quick setup: Add buttons to product pages and blog posts with minimal effort.
Keep & Share Your Cart
Keep & Share Your Cart focuses on turning sharing into a sales opportunity. It allows customers to share their shopping carts with friends or family through platforms like Facebook, WhatsApp, and Twitter. The app costs $4.99 per month and includes a 30-day free trial.
Key features:
-
Sales amplification: Shared carts expose your products to new audiences.
-
Cart recovery support: Customers can send their cart to someone else to help complete a purchase.
-
Simple customization: Choose which social buttons to display and place the share box anywhere, without coding.
Floatify – CTA & Social Buttons
Floatify combines social media buttons with call-to-action elements to improve engagement and usability. It offers both a free plan and a paid plan at $4.99 per month. The app allows you to tailor button styles and placements to fit your store layout and brand identity.
Key features:
-
Conversion-focused CTAs: Add buttons like “Contact Us” or “Shop Now” to guide user actions.
-
Better accessibility: Make social and contact options easy to find.
-
Clean design: Buttons are optimized to look good across all devices and store themes.
Wrap up
Just follow these step-by-step guides on how to add social media to Shopify and start connecting with your customers effortlessly.
But why stop there? Go beyond the default Shopify theme and customize your social media buttons using GemPages - no coding needed! Simply drag and drop social media and feed elements and adjust the look to your liking.
Visit GemPages today to elevate your Shopify pages!
FAQs About Adding Social Media to Shopify Stores


![Shopify Flow — The Complete Guide on Shopify Workflow Automation, Templates & Examples [2026]](http://gempages.net/cdn/shop/articles/Shopify_flow_-_thumbnail_1_7ae9e33a-0ea2-4fae-822d-0e81bb1bba5c_480x480.png?v=1780040989)


