- What is a Post-Purchase Page?
- What is a Thank You Page?
- Why Should You Create a Solid Post-Purchase Page?
- How to Create Shopify Post-Purchase Pages Using GemPages?
- Best Shopify Apps for Post-Purchase Strategy
- Important Elements to Enhance Your Post-Purchase & Thank You Pages
- UI/UX Design Examples of Post-Purchase & Thank You Pages
- Start Building a Solid Post-Purchase Experience!
- FAQs about Post-Purchase
Post-Purchase Pages — Everything You Need to Know [2026]

The eCommerce world is all about optimizing!
Whether it’s your customer experience, store speed, conversion rates, profit margins, or average order value (and the list goes on and on) — you want to keep optimizing them all.
So, in this blog post, we’ll help you with a complete guide to optimizing your post-purchase pages, for profits as well as customer experience.
This guide will answer all your questions —
- What are post-purchase and thank you pages?
- Why should you create post-purchase pages?
- The step-by-step guide to building a post-purchase funnel
- Best Shopify apps for post-purchase
- The important elements you should consider
- Examples and much more….
As the title says, everything you need to know about post-purchase pages is here. So, let’s get started!
What is a Post-Purchase Page?
A post-purchase page is a web page that appears after an order is completed and before the thank you page appears to customers in their buying process.
Typically, this page provides order confirmation and details to customers. However, it can also be used for various purposes such as upselling, cross-selling, collecting or providing certain information (e.g., birth date), and so on.
So, this brings us to another question —
What is a Thank You Page?
A thank you page refers to the web page that appears at the end of completing a certain action on an online store, e,g., purchasing a product or service, buying a subscription, joining the membership, and so on.
Both of these pages are crucial to building relationships with customers.
Also, these pages are great opportunities to upsell and cross-sell products to customers who have already bought something from your brand.
Learn more: Shopify Pages 101: A Beginner's Guide to Creating a Killer Online Store
Why Should You Create a Solid Post-Purchase Page?
ReConvert analyzed the proprietary data of over 40,000 active merchants from different parts of the world and surveyed its users as well.
Here are some of the key findings from its report on the impact of the post-purchase strategy:
- Post-purchase upselling helped merchants increase the average order value by 5.6%.
- The average conversion rate on the thank you page upsell was around 1.7%.
- 91% of ReConvert users consider post-purchase upselling an effective strategy to generate more sales in 2024.
Benefits of Post-Purchase Pages
-
Build customer loyalty
This should be your first priority. Why? Because acquiring new customers is costly.
Research shows that acquiring a new customer used to cost an average of $9 in 2013 and it went up to $29 in 2022 — which is an increase of a whopping 222% in the span of eight years.
So, build a loyal customer base that keeps giving your business. Using post-purchase pages, encourage customers to create an account or join your loyalty program if they haven’t already.
-
Increase sales and revenue
Post-purchase pages are a great asset to promote your other products to your customers. You can show relevant products that provide value to customers.
When implemented right, upselling and cross-selling can increase your sales and revenue to a great extent.
Learn more: 15 Best Summer Sales Promotion Ideas For Your Shopify Store
-
Enhance customer experience
Post-purchase pages could be used to bring a better user experience for your customer. For example, you can assist customers with guides or resources that will make their lives easier.
Also, make sure the customers have the assurance and necessary details regarding the items they purchase. For example, sharing the tracking details, invoice, etc.
-
Collect customer feedback
It doesn’t have to be just about selling more products, you could even use a post-purchase page to collect feedback from customers. Asking for customer feedback could help you recognize the areas of improvement in your business or sales processes.

How to Create Shopify Post-Purchase Pages Using GemPages?
Step #1: Define Your Post-Purchase Strategy
What do you want to achieve with your post-purchase strategy?
Well, that makes total sense. Nothing wrong with it.
But — not necessarily every brand wants to (or should) focus on upselling and cross-selling only. Some businesses may want to focus on building a long-term relationship, and not try to immediately gain more sales from customers.
For example, let’s say you’re selling expensive goods costing around $1,000-$2,000. Once you close a sale, you may want to encourage the customer to refer your product to others to get more new customers. So, in this case, you may prioritize referral promotion over upselling or cross-selling other products.
In a nutshell, depending on the nature of your business, type of products, and scale of your business, consider what are the most important aspects for you and create your strategy accordingly.
Pro tip: Lead generation is the fuel that your business needs to keep running. Implement a robust lead generation sales funnel strategy right now.
Step #2: Choose Your Post-Purchase Shopify App
Shopify App Store has plenty of great solutions in the form of apps for every need of commerce entrepreneurs.
And that’s where the question arises — which app should I use to create post-purchase pages? Review the post-purchase apps available in the Shopify App Store and choose the one that best suits your needs and budget.
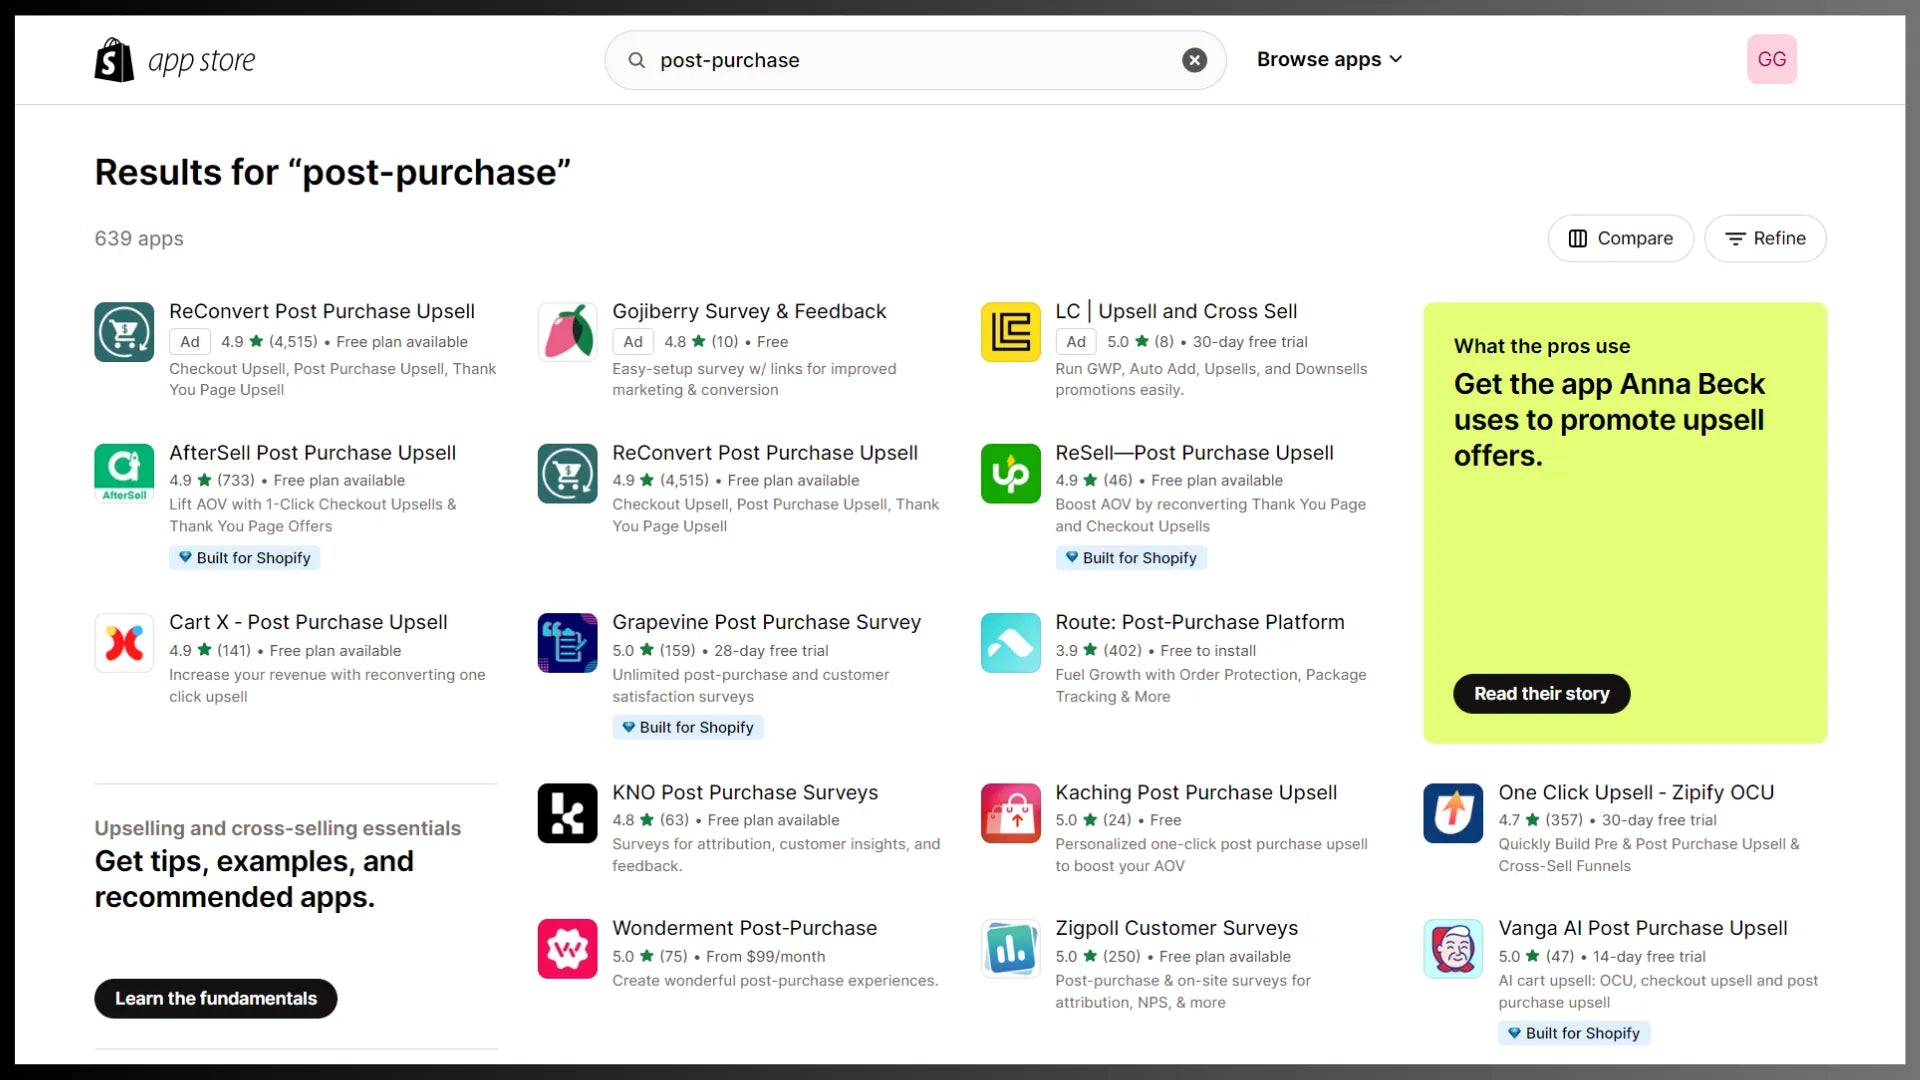
In the next section, we’ll share our top 3 recommended post-purchase apps. For this tutorial, we’ll use GemPages - A conversion-focused Page Builder app to build Sales Funnels with Post-Purchase Upsell Offers.
Step #3: Install and Configure the App
Go to the GemPages app in the Shopify App Store and click on the “Install” button.
Review and approve the access permissions and then click the next “Install” button.

- Choose “Sales Funnels” in the GemPages Dashboard, and then click on the “Create new funnel” button to start creating a funnel.
 Step #4: Set Up Your Post-Purchase Funnel
Now, you’re all set to create your first post-purchase funnel.
You will have two options to choose from:
- Post-purchase Offers: Maximize revenue by creating tailored offers for customers right after they complete a purchase, whether it's a single item or multiple products.
- Sales Funnel: From Sales Page to Post-purchase Offers: Develop a complete sales funnel for a single product that includes impactful post-purchase offers to drive higher revenue for your store.
Please note:
- Post-Purchase Offers: You can select multiple products (all products or specific ones).
- Sales Funnel: Only one product can be selected.
In this guide, we choose the Post-purchase Offers option.
Now, finish the steps of the funnel:

- Edit Trigger: Display the offer if the customer buys any product.

- Add product offer: Choose products for pre-sale pages. These selections ensure that upsell offers appear when these products are purchased. Then, click “Next” to set the discount and select “Save” to finish.

With GemPages Sales Funnel, you can create an A/B test to quickly find the most effective upsell product with the highest CR to help increase revenue, etc., thanks to the A/B Offer Testing feature.
You can also customize the design of the Upsell offer page according to your preferences, or you can use GemPages’ available templates to create an optimized Upsell offer page with a high conversion rate.

The above is a step-by-step guide for setting up a sales funnel with GemPages. To activate the funnel, proceed with the following steps.
Important note: Although the pre-built post-purchase funnel template is an easy way to get started quickly, you may want to edit your funnel to implement your own strategy for more optimization.
Step #5: Test Your Post-Purchase Experience
In the customer journey, post-purchase and checkout are crucial phases. You would not want to take any risk of messing things up here.
So, after completing the entire setup, test it to check if everything is working as expected. You can place a test order either in a test mode or make a real transaction in your store.
Also, monitor and analyze how your post-purchase funnel is performing in terms of conversions and revenue. If you find areas of improvement, you can even perform A/B tests with different designs or offers to improve your conversions.
If you’re using a tool like GemPages Sales Funnel (which we mentioned earlier), you can use its features to make this step even smoother.

Best Shopify Apps for Post-Purchase Strategy
As we mentioned before, Shopify App Store has many apps that can help you with your post-purchase strategy. Based on the ratings and reviews, here are our top recommended post-purchase apps:
1. ReConvert Post Purchase Upsell
ReConvert is one of the most widely-used post-purchase upsell apps with over 5213 reviews (4.9 out of 5 stars) on the Shopify App Store.
With ReConvert, you can create powerful one-click upsells, post-purchase upsells, and discounted upsells directly on your checkout and thank-you pages. Its post-purchase upsell funnel and custom checkout blocks are designed to maximize your conversion rates (CVR) effortlessly.

ReConvert also allows you to collect birthdays, offer product bundles, cross-sell items, and more, helping you create a tailored shopping experience for your customers
Key features:
- Lets you upsell and cross-sell products on the post-purchase and thank-you pages.
- Set up surveys and collect the birthday information of your customers on the thank you page.
- Easily build upsell funnels through a drag-and-drop editor and customize the pre-built template.
Pricing:

2. AfterSell Post Purchase Upsell
After ReConvert, here comes another popular post-purchase upsell app on Shopify. This app has also earned a “Built for Shopify” badge which is Shopify’s quality standard indicating the app is great in terms of speed, ease of use, and value that it provides to Shopify merchants.

Key features:
- Create one-click upsell and downsell offers with single or multiple products.
- Customize the thank you page to display customer reviews and FAQs (Frequently asked questions).
- Use triggers to offer upsells based on the products, order value, customer tags, UTMs, etc.
- Perform A/B testing to test different offers.
Pricing:

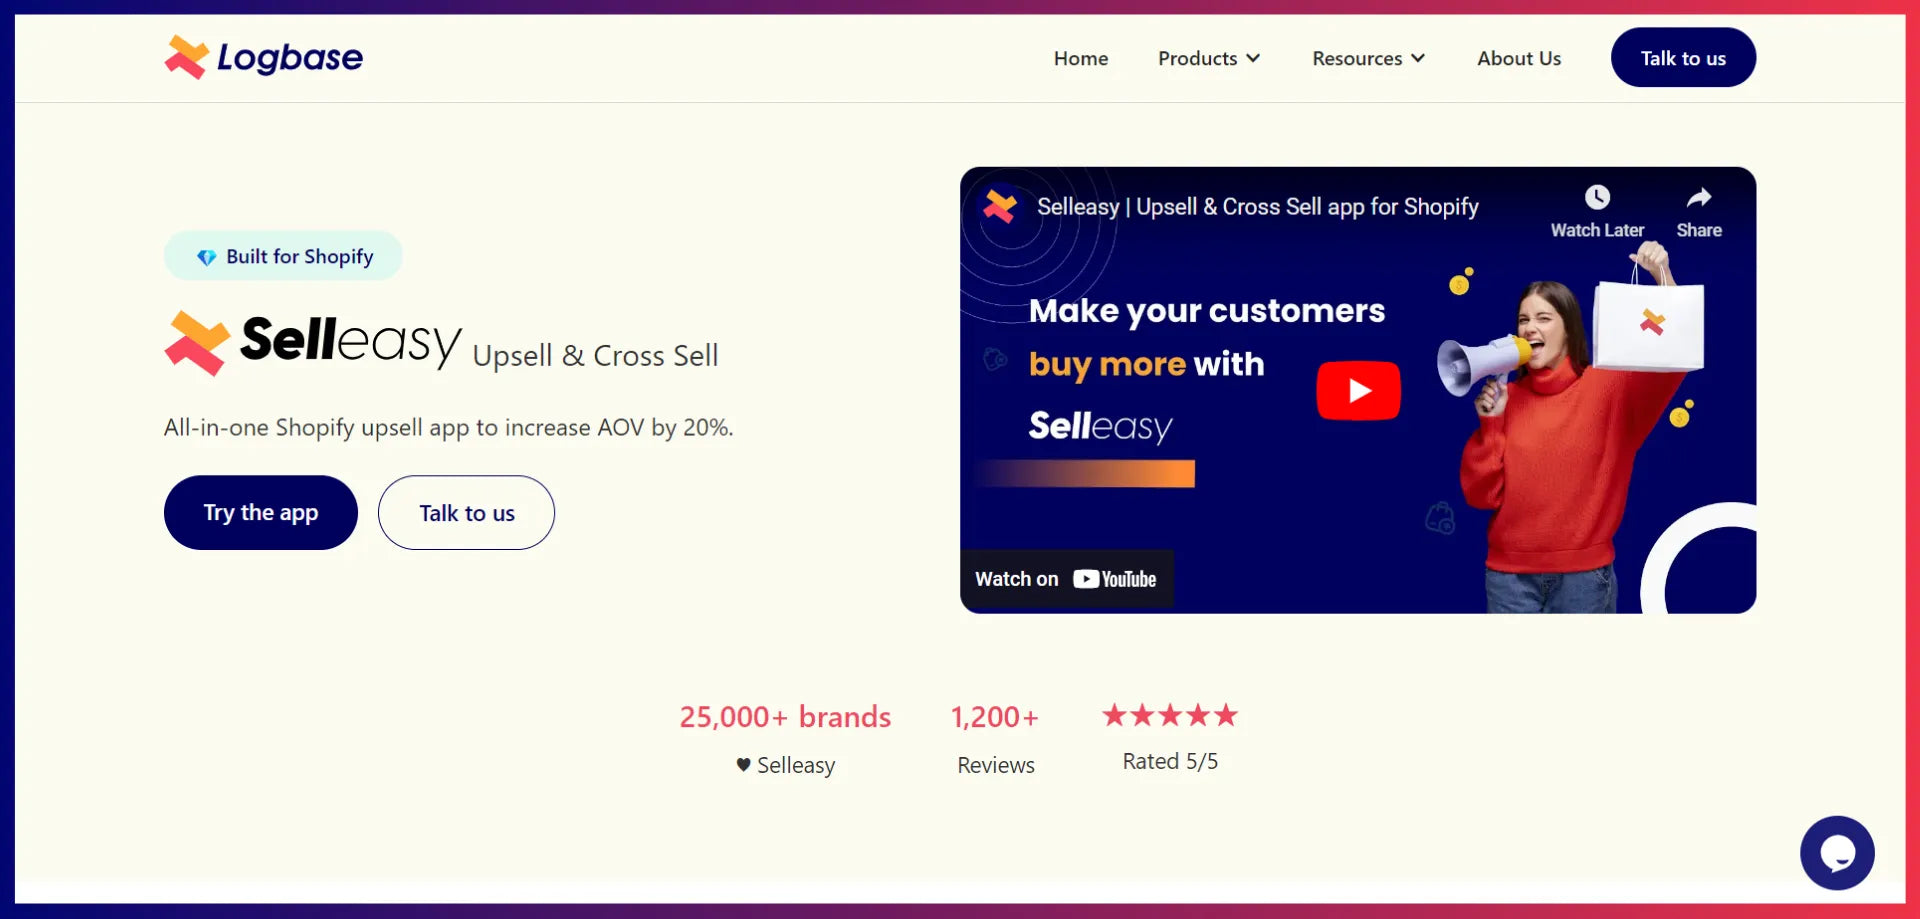
3. Upsell & Cross Sell — Selleasy
This app not only allows you to build post-purchase upsells and cross-sells but also pre-purchase ones. It also has the “Built for Shopify” badge.
Key Features:
- Use Amazon-like “frequently bought together” feature to promote and sell relevant products.
- Create one-click post-purchase upsells to make it easy for customers to quickly buy more products.
- Offer page upsells and cross-sells on the thank you page.
Pricing:


Important Elements to Enhance Your Post-Purchase & Thank You Pages
Just to be clear, we’re not saying you should be using ALL of these elements together in your post-purchase pages. But you may consider a combination of these elements depending on your business and strategy.
1. Helpful Information Relevant to the Purchase
First of all, don’t miss the core purpose of these pages. Provide the necessary information customers need on the post-purchase page. Then, you may go with other elements that can increase your sales, revenue, or business processes (through feedback).
Also, the thank you page should display your gratefulness in some way. You can display a thank you note or video to show how grateful you are for their business.
2. Relevant Upsells & Cross-Sells
Upsells and cross-sells are crucial to increase your sales and average order value. But make sure those products are relevant to what the customers are buying.
Personalized recommendations can significantly influence the customer experience. You can even place a collection list instead of specific product(s).
3. Customer Account Signup
Encourage customers to create an account. If you have a loyalty program or any other membership program, you could invite them to join the program.
It will help you build a long-term relationship with your customers and bring more opportunities for repeat sales.
4. Post-Purchase Survey
Customer feedback is crucial to grow your business. And what could be a better time to ask for their feedback than instantly after their purchase, right?
Ask for feedback or run a survey to analyze what could be improved or focused on. For example, you can ask the customers how they found your website, how they would rate their overall buying experience, how likely they are to buy again from your brand, etc.
While you should try to gather important information, make sure to keep the survey as short as possible. AI analysis quickly interprets survey results, providing actionable insights that help you understand customer needs and improve what matters most to them.
5. Video Guide or Message
If your product is complex and requires detailed instructions on how to use it, you can create a video tutorial and share it on the thank you page.
You can even create a little video thanking the customer for their purchase. Little things like these go a long way.
6. Impact Statement (If applicable)
If your brand is involved in a mission or cause where you’re contributing a certain percentage of your revenue to the cause, you can let customers know how their purchase is contributing to that mission or cause.
It will not only make them feel better about their purchase but it will also help you build brand loyalty with your customers.
7. Social Media Details
Use post-purchase pages to boost your social media following. Provide them with the links to your social media accounts, and encourage them to follow you there. As a best practice, you can even tell them why they should follow you.
8. Social Sharing CTA
When customers feel excited after buying something, they typically like to share it on social media with their circle.
Make it easy for them to share it on social media by providing social sharing CTA (call to action) buttons. This can also help you with word-of-mouth marketing or referrals.
9. Countdown timer
Setting up a countdown timer for upselling and cross-selling products creates a sense of urgency in customers and entices them to make a quick decision. Thus, it can help you increase the conversion rate on upselling and cross-selling items.

UI/UX Design Examples of Post-Purchase & Thank You Pages
Laumière Gourmet Fruits
Laumière Gourmet Fruits is a premium food brand that offers dried fruit-based products. The brand uses ReConvert, the Shopify app we’ve seen in our guide, to offer cross-selling products on its thank you page.
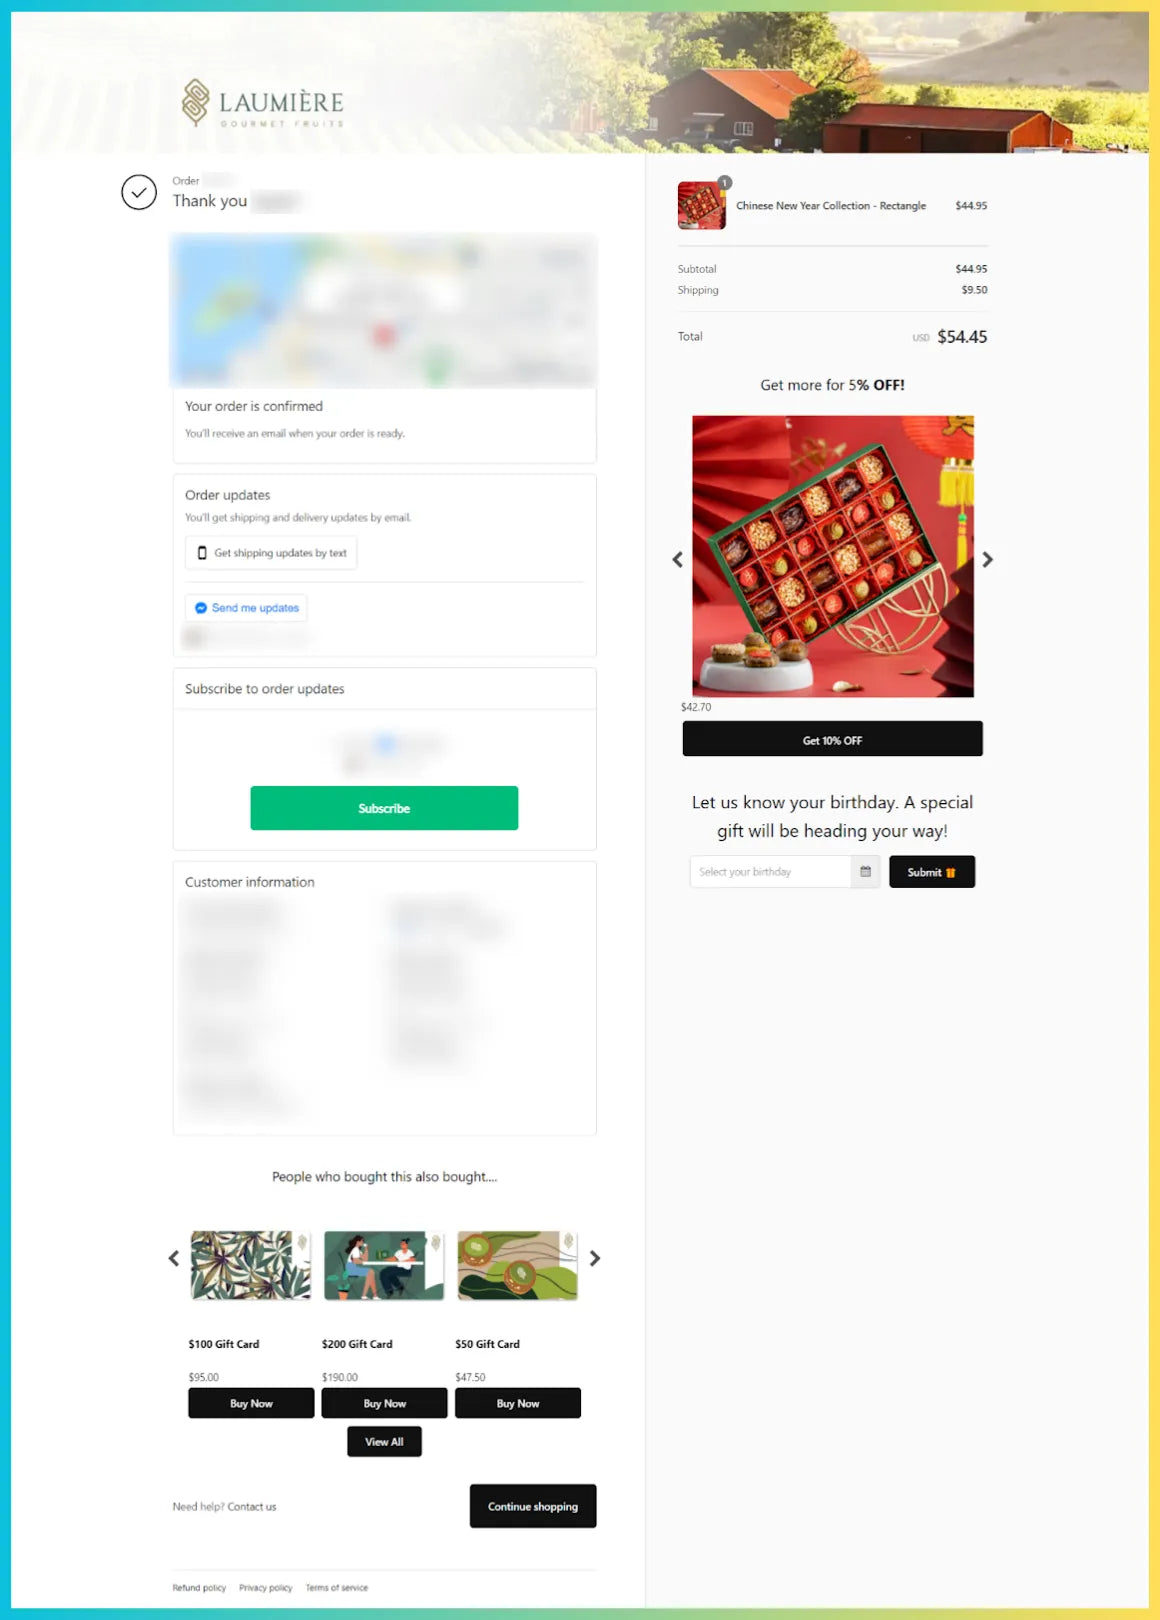
Image credits: Laumière Gourmet Fruits & ReConvert
According to ReConvert, the brand was able to achieve a 7.01% conversion rate with a 10% increase in its overall revenue.
Marks & Spencer
The order confirmation page of Marks & Spencer—a clothing, home, and food brand—is a great example of a clean and appealing post-purchase page design.
The brand has kept things simple and encourages customers to create an account with a short and easy registration process. Along with the registration block, it explains the benefits of creating an account.
Also, the brand has promoted its rewards program, Sparks, and briefly shows how customers’ shopping with the brand contributes to charity donations.
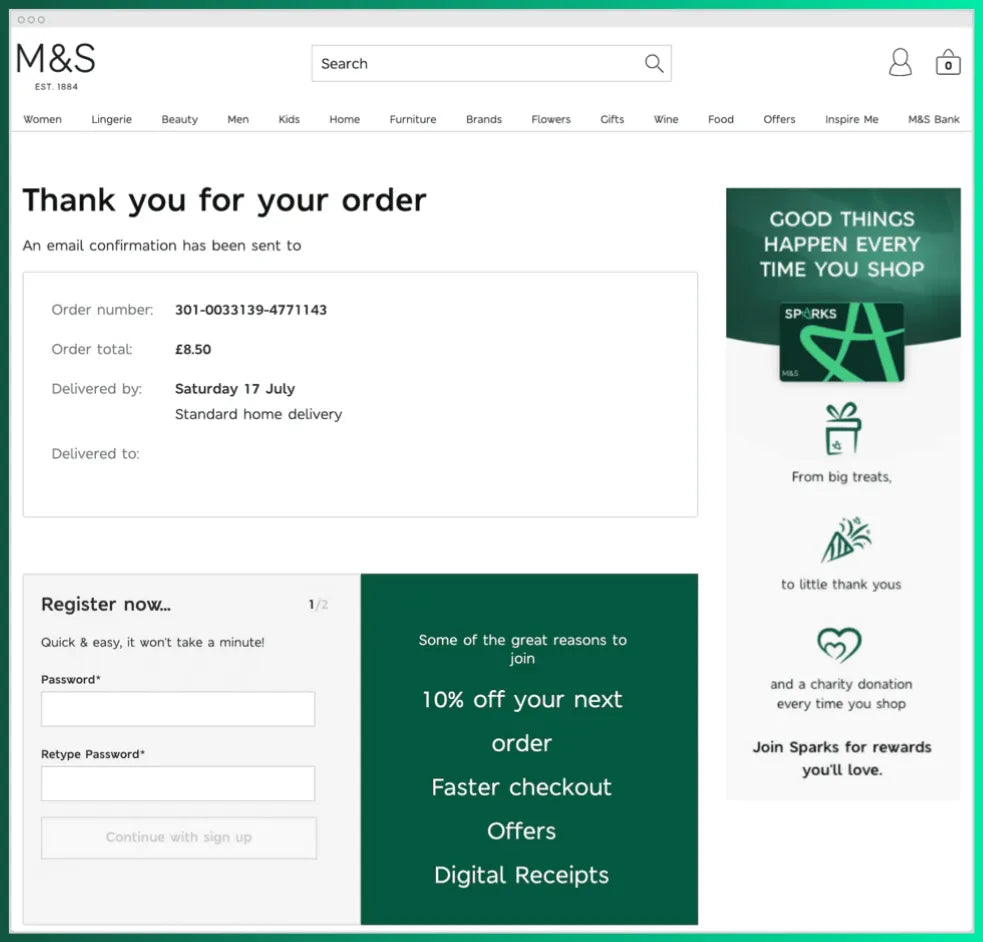
Image credit: Marks & Spencer and Woostify
Start Building a Solid Post-Purchase Experience!
Now you have all the needed information about the basics, strategies, tools, and best practices to create a great post-purchase experience.
So, it’s time for the implementation! Start building your post-purchase funnel and it’ll surely help your business to grow at a faster rate.
Keep in mind — your post-purchase funnel should not adversely affect your customers’ shopping experience. It should add value to their lives and enhance their satisfaction.
After all, the ultimate goal is to make your customers your loyal fans and build a brand that they would advocate to others too.


 Facebook Community
 Change Log
 Help Center


![How to Build a High-Converting Facebook Ads Funnel [2026]](http://gempages.net/cdn/shop/articles/Facebook_Ads_Funnel-thumb_7a583f1a-80ec-4b88-bdd8-3724e5fb0740_480x480.webp?v=1767078937)


