


 Facebook Community
 Change Log
 Help Center


Building an eCommerce Website from Scratch — a Complete Step-by-Step Guide

Building your eCommerce website is the beginning of your global brand.
While technological advancements have made it easy to build an eCommerce store, it’s still imperative that you choose the right platform, tools, and method.
We’ve created this comprehensive step-by-step guide to building an eCommerce website from scratch. This guide will cover the important aspects that you should consider while building your eCommerce website.
Let’s get started with the important stuff straightaway!
Building an eCommerce Website from Scratch
Step 1: Choose Your eCommerce Platform
While building a home, a pillar is an important foundation on which the entire infrastructure is built. In the same way, the eCommerce platform is the pillar of your eCommerce business.
And that’s why, it’s one of the first and most crucial steps to building an eCommerce website. Here’s how you can get started with choosing your eCommerce platform:
1.1 Considerations to choose the platform
Take your time to research and finalize which platform best suits your needs. Consider these factors to find which is the best eCommerce platform for your unique needs:
- Business model
- Decide whether you want to start your own product-based business, dropshipping business, service-based business, digital-product-based business, subscription box business, or introduce a totally new concept.
- Budget
- All platforms have different pricing. See what fits in your budget.
- Design & Functions
- What level of design flexibility do you need in your platform and what other powerful tools do you require to run your business operations smoothly?
Once you’ve brainstormed on all these aspects, you can match the eCommerce platform with your qualifying criteria.
1.2 The best eCommerce platforms in the world
Here are the most popular eCommerce platforms in the world:
- Shopify:
Overall, Shopify is a powerful eCommerce platform suitable for businesses of all sizes. It’s an all-in-one solution with advanced functions and a massive ecosystem of useful themes and apps. We highly recommend using Shopify if you’re planning to start a product-based, dropshipping, or even subscription box business globally.
Just to let you know, you can achieve design flexibility with Shopify as well by using the GemPages page builder app.
- Squarespace
Squarespace offers you great flexibility with the store design along with beautifully designed templates.
- WooCommerce
WooCommerce with WordPress is one of the most widely used eCommerce solutions in the world. Use this solution if you’re looking for a cheaper option; however, the experience of building your store may not be as good as building it with a platform like Shopify or Squarespace.
- Hostinger
Hostinger eCommerce Builder tool empowers anyone to launch a sleek, high-performing online store in minutes. With beautifully designed templates, easy drag-and-drop customization, and built-in eCommerce features like payment processing and inventory management, it’s an all-in-one solution tailored for growth.
The builder lets you create unique, engaging shopping experiences with just a few clicks, from personalized layouts to seasonal promos. Perfect for first-time entrepreneurs and established brands alike, this tool makes building and managing an online store effortless and impactful.
- Wix
Wix offers a drag-and-drop eCommerce website builder, templates, hosting service, and domain name registration as well. Wix is mostly used by bloggers and small business owners. In terms of the design flexibility, Wix users have certain limitations.
- BigCommerce
BigCommerce offers a B2B (business-to-business) and B2C (business-to-consumer) digital commerce platform that’s suitable for small businesses and new store owners.
Shopify is used by millions of entrepreneurs in over 170+ countries.
1.3 Choose the right pricing plan
Once you’ve finalized your eCommerce platform, you need to choose the appropriate paid plan based on your needs. Of course, you can use the free trial in the beginning but ultimately you’ll need to move to the paid plan. So, it’s better you start evaluating the right plan for your business.
If you’re a small business starting with Shopify, the Basic plan ($29/month) is good enough to start your eCommerce journey.
Step 2: Get Your Domain Name & Hosting
Now, it's time to buy a custom domain name for your brand.
2.1 Things to consider when buying a domain name
Your domain name (which is obviously going to be your brand name) is one of the most important elements of your branding.
At this step, emphasize two things:
Be creative: Make sure your domain name is short, unique, and memorable.
Be careful: Make sure it isn’t infringing a trademark of a registered brand.
2.2 Where to buy your domain name & hosting
If you choose Shopify, you don’t need to go to third-party providers for domain name and hosting. You can buy a domain name along with SSL (Secure Sockets Layer) from Shopify, whereas hosting is already included in all Shopify paid plans.
Similarly, other platforms like Squarespace and Wix also offer domain name and hosting services. When using WooCommerce with WordPress.org, you need to buy a separate hosting service and there are multiple hosting providers for that in the market.
Step 3: Get the Useful Apps or Tools
An eCommerce platform alone is not enough to manage every single aspect of your business. Depending on your business needs, you may need to integrate other apps or tools with your platform to manage specific functions.
Here are the key areas:
- Store Design
- Email & SMS Marketing
- Customer Support: Live Chat or Omnichannel Support
- SEO (Search Engine Optimization)
- Order and Inventory Management
Among all eCommerce platforms, Shopify has one of the most powerful ecosystems of advanced apps. The Shopify Apps Store has more than 7,000 apps.
Step 4: Design Your Website & Create Pages
Alright! Now, it’s time to get the creative work done!
4.1 Choose your theme or eCommerce website builder
Depending on your eCommerce platform, there are different options for you to start building your eCommerce store. For example, Shopify has 70+ themes in its theme store — including free as well as paid themes.
Similarly, other platforms like Squarespace, Wix, and WordPress (WooCommerce) also have the option to choose the website builder or template to start designing your store.
4.2 Customize your store design
Once you’ve finalized your theme/website builder/template, you can start customizing your store with your unique branding. Start with the main store pages, i.e., homepage, collection, product, and checkout pages.
4.3 Create and design other store pages
Apart from your main store pages, there are some other important store pages that you need to create for various purposes. Here are some of the key pages:
- About Us page
- Contact page
- Store Policies — Privacy Policy, Shipping Policy, Returns & Refund Policy
- Terms of Service
Pro tip: If you’re using Shopify, you can have multiple theme options to choose from but those themes come with certain limitations in terms of design flexibilities. As we mentioned before, you can install GemPages to create highly professional and aesthetically beautiful store designs.
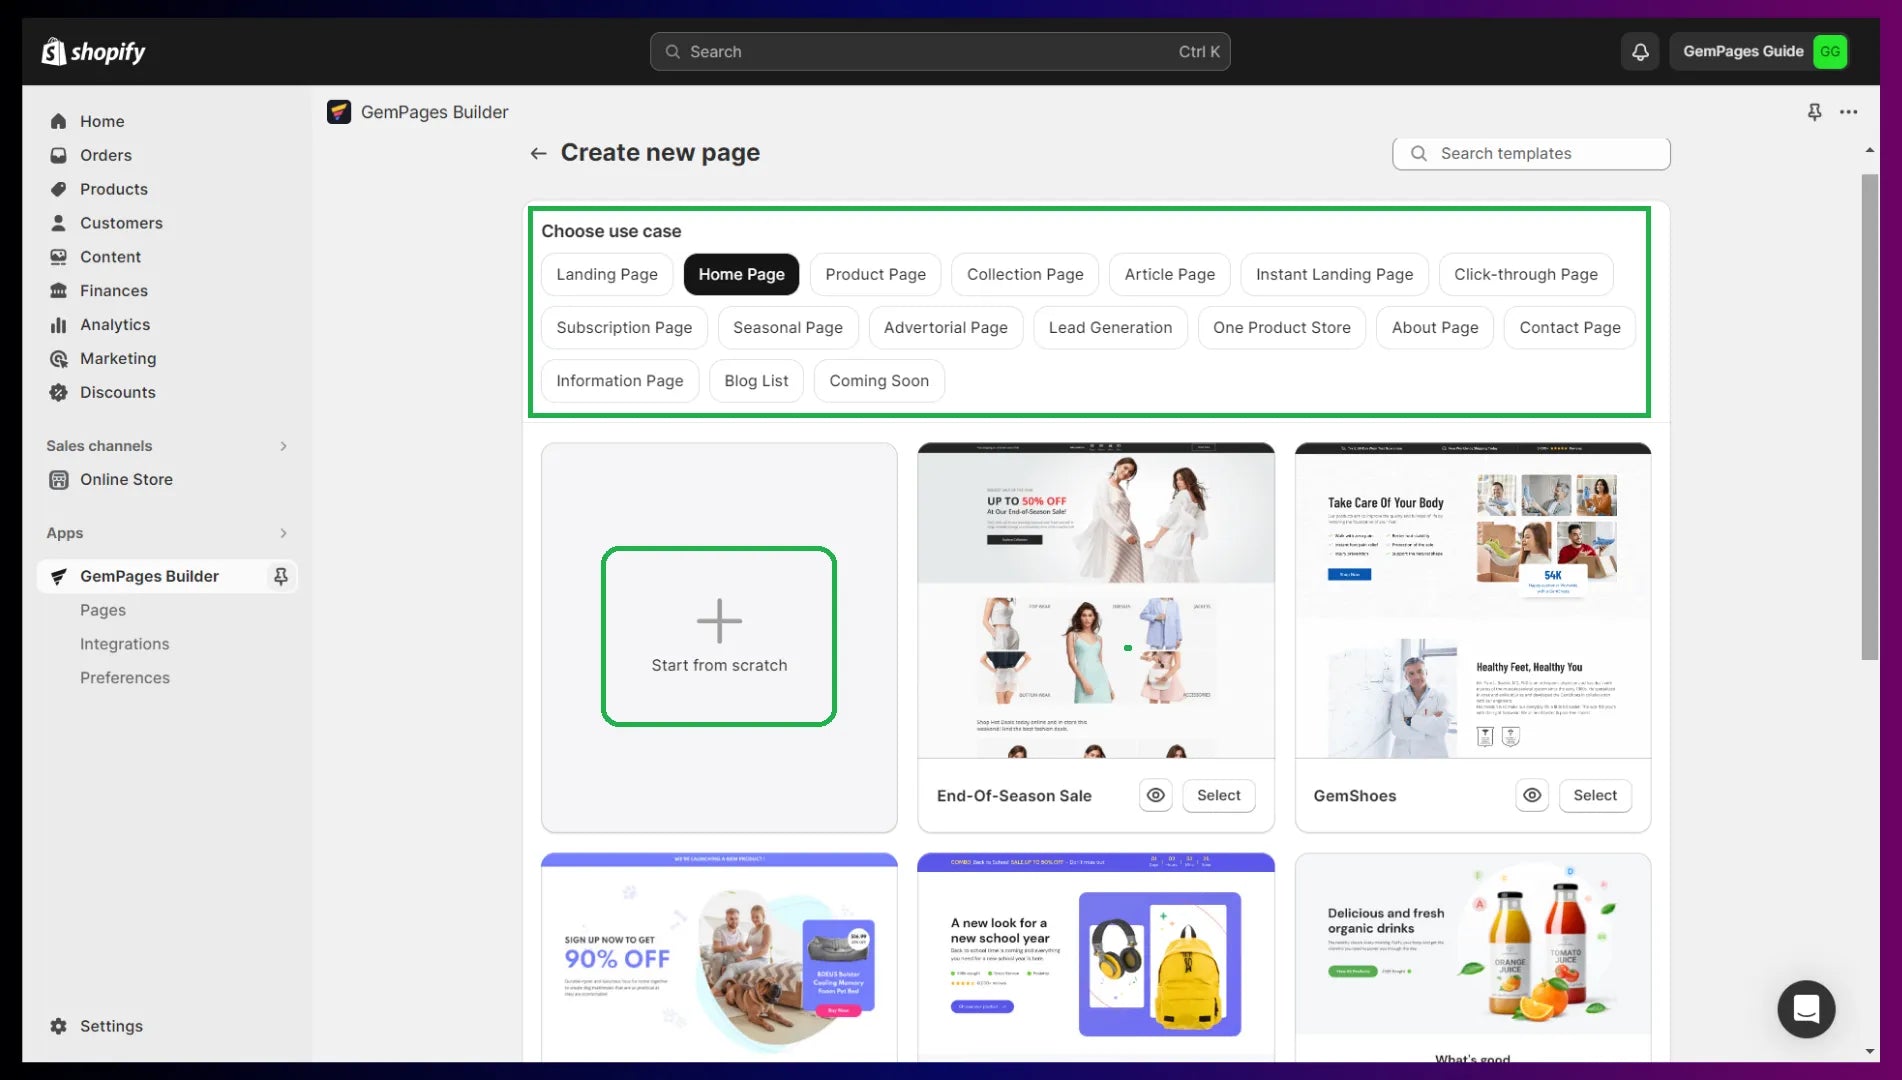
GemPages has an extensive library of professionally designed store pages for different needs and events.
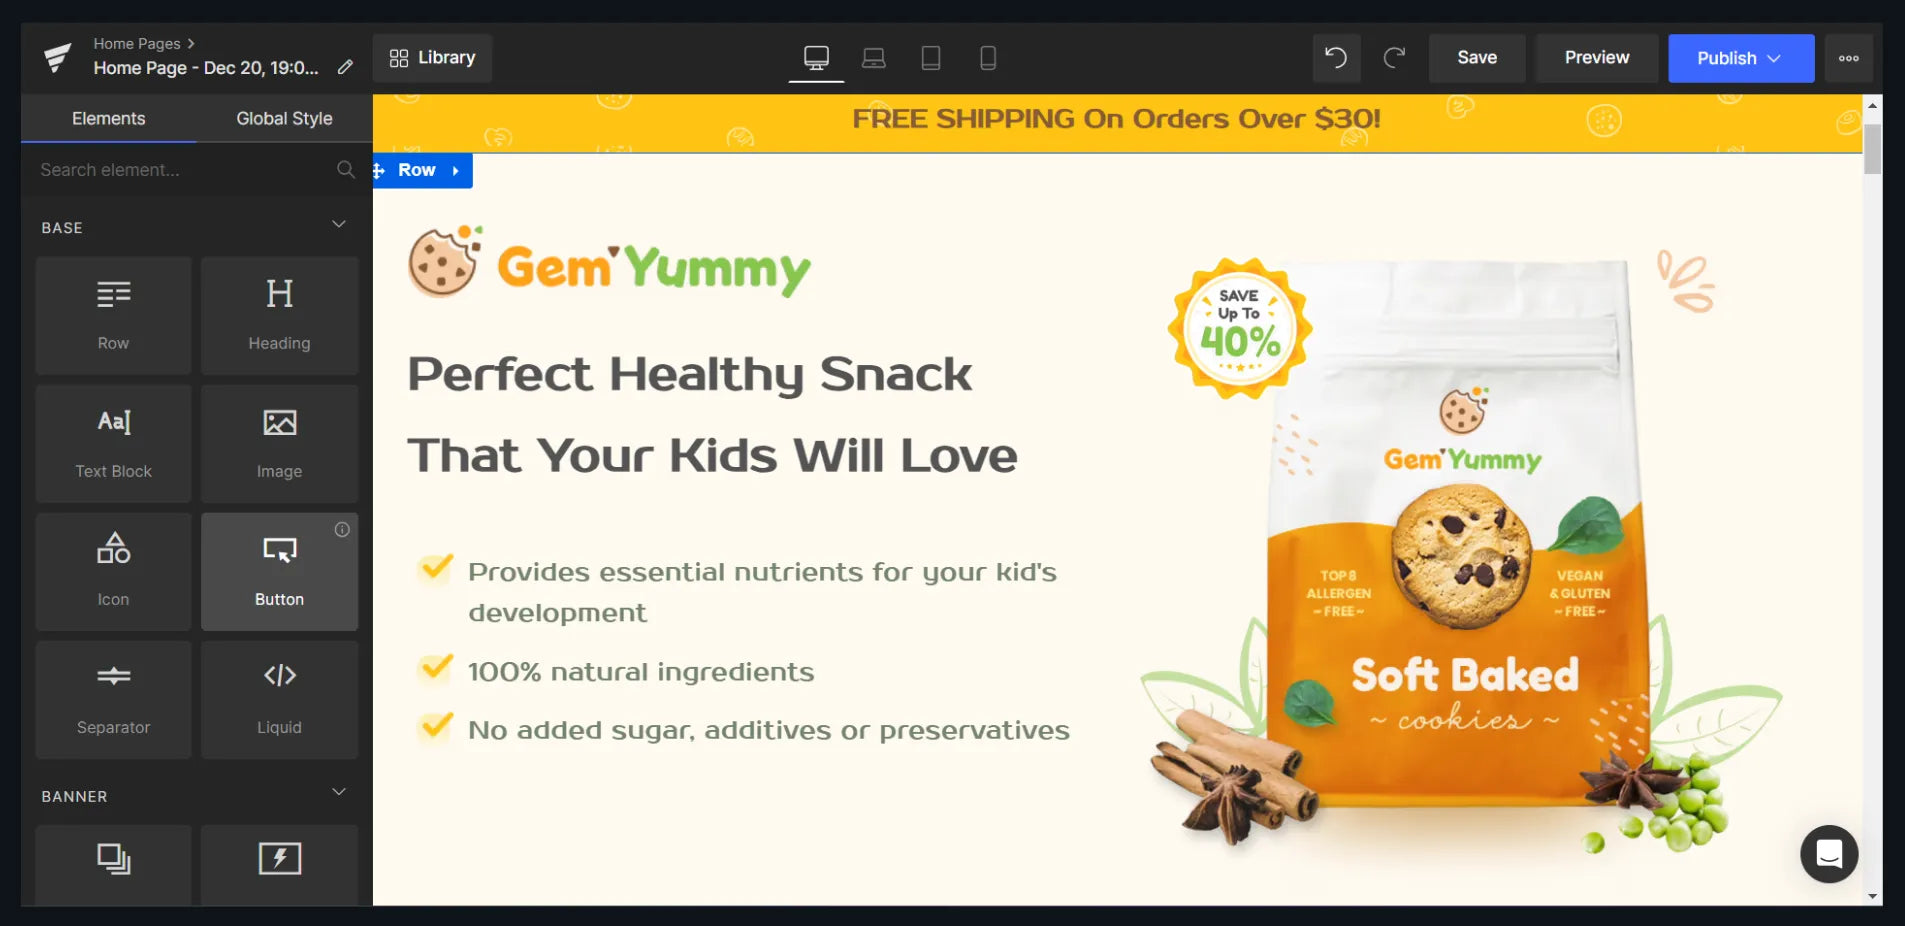
GemPages lets you customize your store pages with an intuitive drag-and-drop editor to create a premium website design with your brand and style.
Step 5: Create Products and Collections
5.1 Create your products
Listing your products can be a time-consuming task, especially if you’re planning to sell hundreds of products; however, it’s crucial to do this properly. After all, you want to sell your products with a good conversion rate.
Here are some of the key aspects you should consider when creating your products:
- Images: Add clear, high-quality, beautiful, and optimized product images.
- Product Copy: Make sure to write compelling and SEO-friendly product descriptions.
- Instructions: Include the necessary product information such as size chart, wash & care instructions, etc.
5.2 Create your collections
To make sure your products are easy to find for customers, organize your products in different categories with collections.
For example, if you’re a clothing and apparel brand, bifurcate different collections with categories like product type, gender, season, trends, events, promotions, etc.
Step 6: Configure All Platform Settings
6.1 Set Up a Payment Provider(s)
A payment provider helps you collect payment from your customers and transfer it to your bank account. Overall, there are many payment provider options; however, not all of those options are available in all countries.
Find out the available options in your country and see which one’s the best for you. You can choose to go with multiple options. If you’re on Shopify, you can go with Shopify Payments as long as it’s available in your country.
And if Shopify Payments is not available, you can choose third-party payment providers like PayPal, Stripe, Authorize.net, Verifone, Opayo, and many others.
6.2 Configure Inventory and Shipping Settings
Inventory:
Inventory management is one of the crucial aspects of eCommerce. You want to ensure that you’re not keeping too much stock to increase your warehouse cost, and at the same time, you don’t want to miss out on sales due to going out of stock.
Even if you’re going to ship through a third-party supplier, in case of dropshipping, you need to keep an eye on the inventory status.
Shipping:
Shipping settings help you set conditions to ship your products to different countries/regions. If you’re going to sell your product globally, this setting becomes even more critical because you may want to set different shipping rates for the local country and the rest of the world.
For example, let’s say you’re selling your products worldwide and those products are being shipped from the US warehouse. You would want to set different shipping rates for the orders to be delivered in the US and other countries. You may even go a step further and set different rates for different states within the US as well.
6.3 Set up Taxes and Duties
Well, honestly, this can be a challenging task! 😰
The thing is, every country has its own rules and regulations regarding taxation, and that's why, it’s important to research your tax obligations for your country and the country where you’ll be selling your products.
Ideally, you should consult a tax professional for reliable guidance on your tax obligations.
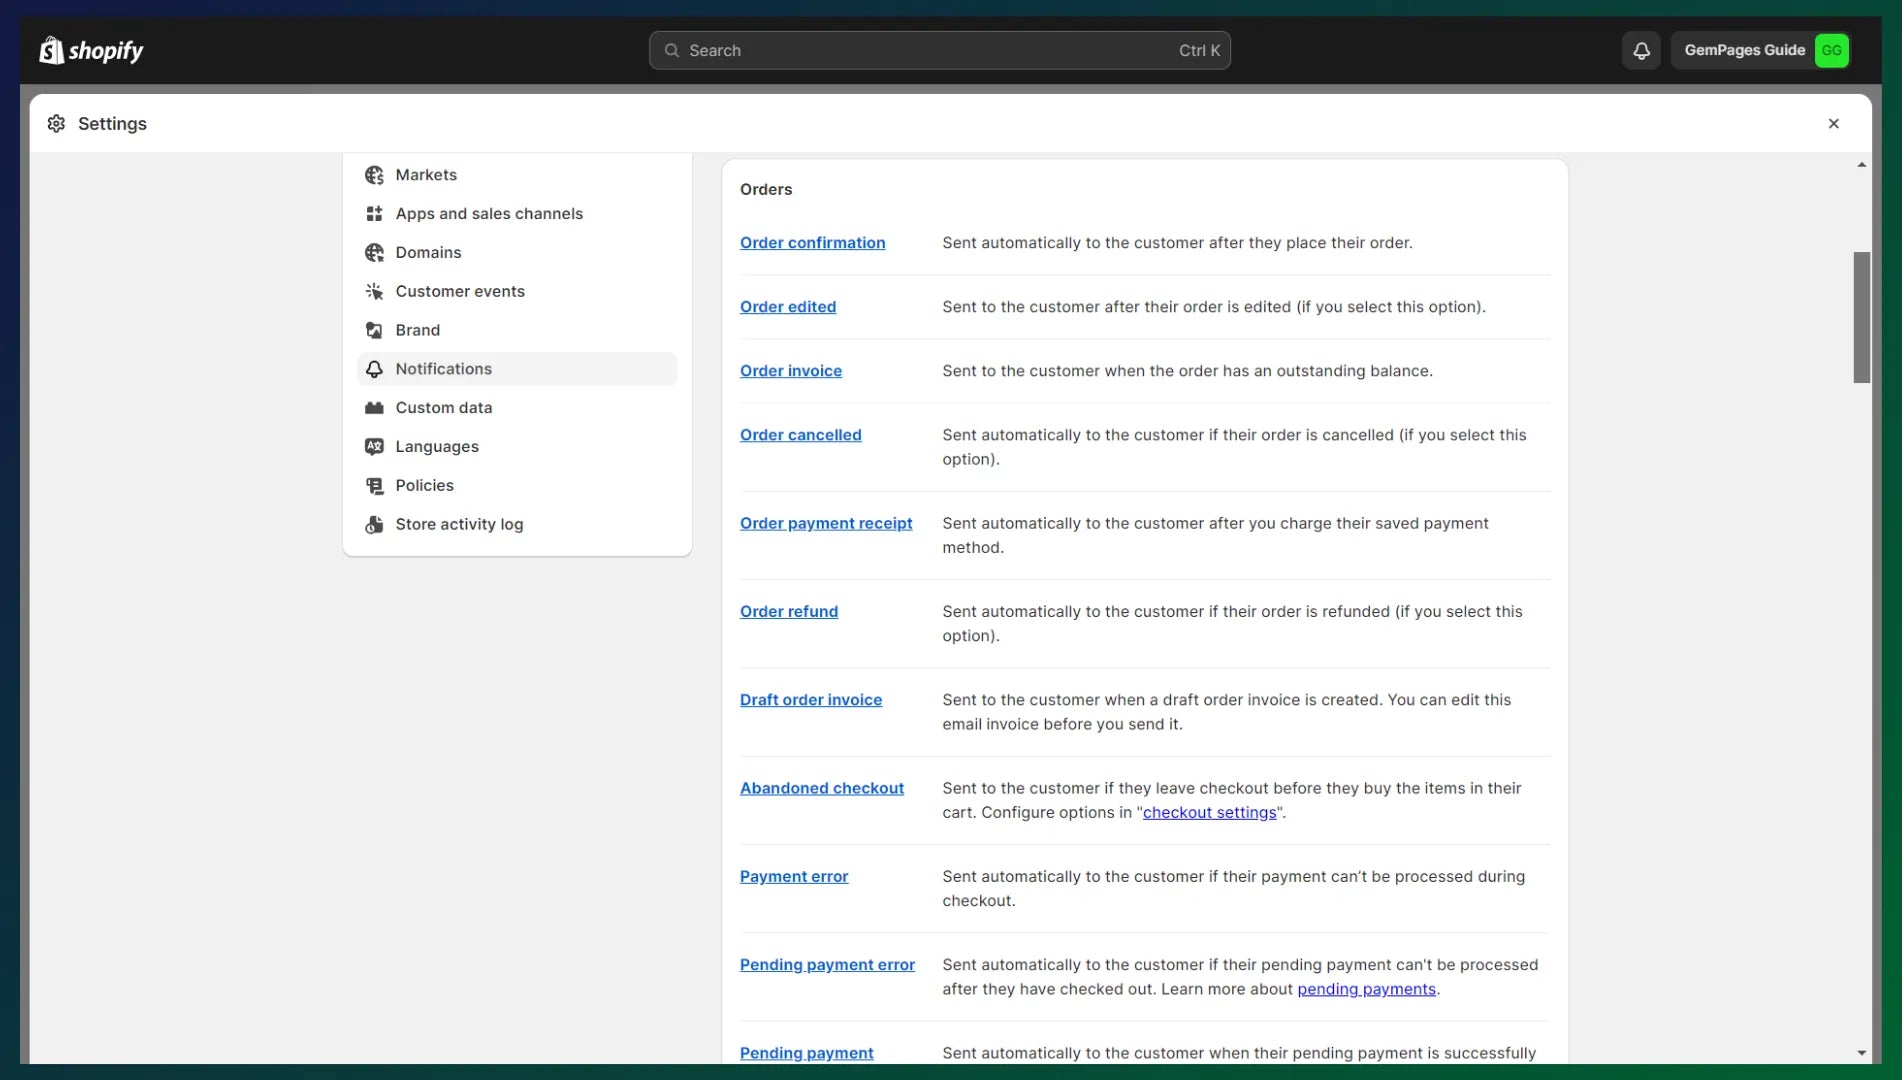
6.4 Notification Emails
Setting up notification emails is one of the basic requirements as a part of your sales process. When a customer places an order, you’ll need to send emails such as order confirmation email, invoice email, shipping confirmation email, etc.
Shopify makes it easy to send all such notification emails by allowing you to set up automated notification emails.
Step 7: Set Up Google Search Console & Google Analytics
7.1 Setting Up Google Search Console
This is one of the must-have tools for any eCommerce store.
Google Search Console is a free tool from Google that helps you submit your sitemap to Google, and index your store pages so that they can appear in Google Search results.
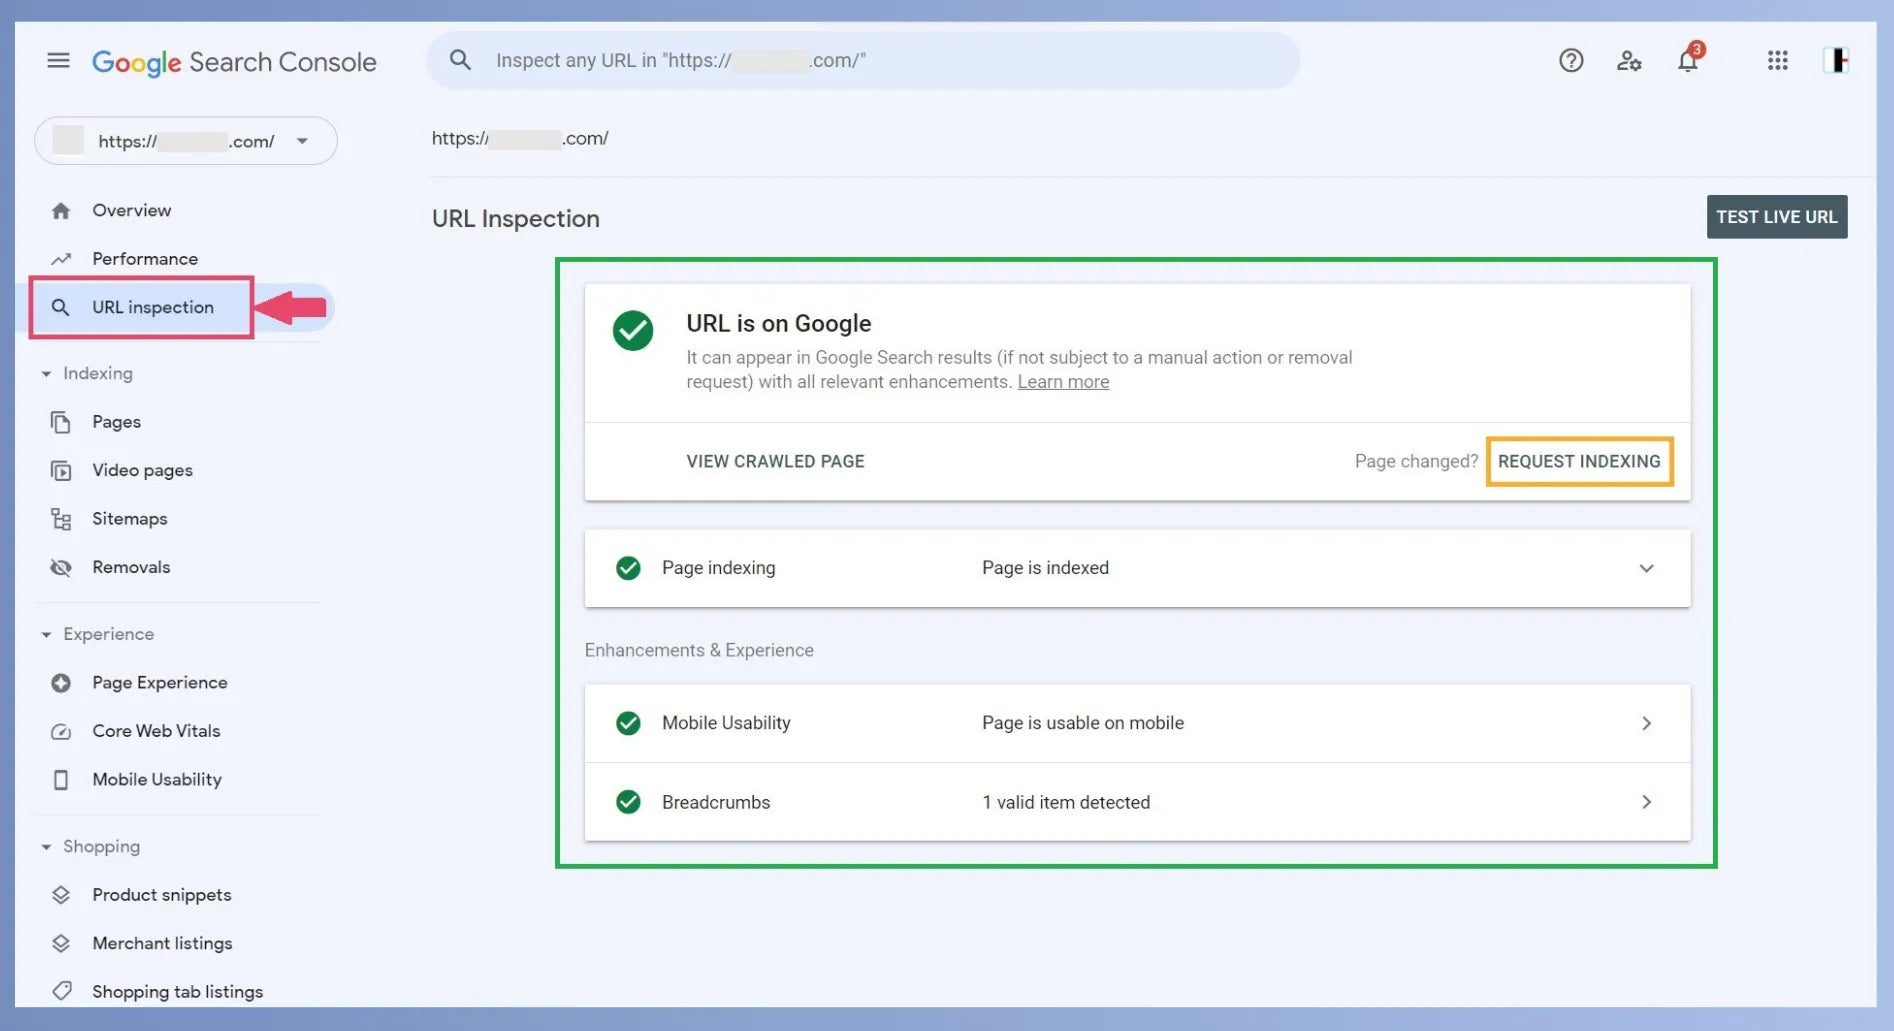
On top of that, Google Search Console also allows you to examine and troubleshoot your web pages to enhance their performance in Google Search.
7.2 Setting Up Google Analytics 4
Google Analytics 4 (GA4) is also Google’s free platform that lets you capture and analyze the traffic data for your website and mobile app. By reviewing and analyzing your traffic data regularly, you can identify customer behavior and how they interact with your store.

The ultimate goal of doing all these analyses is to improve your website and increase the conversion rate.
Learn more: How to Set Up Google Analytics 4 (GA4) for Your Shopify Store
Step 8: Test Your Store Entirely
Once your store is ready with everything, it’s time to test if everything is functioning as intended. Visit your store through an incognito window as if you’re a customer. Buy a test product from your store and see how things are working.
7.1 Test third-party apps or tools
Check all the apps and tools. For example, if you’ve installed a live chat app on your store, initiate a chat and see if it’s working fine. If you’re allowing customers to create an account with your store, create one account for yourself first. Similarly, test all such functions like the newsletter, loyalty program, or anything else applicable to your store.
7.2 Test the payment processor(s)
Before a customer tries buying a product from your store, you should try buying a product for test purposes. You can place a test order with dummy credit card details provided by the payment processor.
If you want to test it even further, you can just place an actual order. Create a $5 product and purchase it from your store to see how smooth is payment processing as well as checkout.
7.3 Test GA4 and Google Search Console Configuration
When you’re performing test orders on your store, simultaneously, check if Google Analytics is capturing your store visits to ensure it’s set up correctly and tracking accurate data.
Check your Google Search Console and see if the sitemap is submitted successfully. Inspect your website URLs to see how many of them are indexed on Google. For the pages not indexed, check what’s the issue, fix it, and request indexing again.
Step 9: Launch Your Store
Finally, once everything’s done and tested, it’s time to go live!
Launching your eCommerce store is not only an exciting moment on a personal level but also a crucial event from a business standpoint.
You want to make sure you spread the word about your store launch with as many people as possible. Share the launch announcement with your family and friends and ask them to share it with their network too.
You can create a launch campaign with the help of paid ads and influencers to increase your brand awareness.
10 Best eCommerce Website Ideas
1. Dropshipping Business
Dropshipping is one of the most popular business ideas in the eCommerce world. In this business model, you can sell products without holding any inventory.
When you receive an order from a customer, it goes to the supplier and they will take care of fulfilling and shipping the order to your customer.
Dropshipping Tips: 15+ Proven Strategies to Skyrocket Your Sales
2. Private Label Products
Private label products are sourced from a supplier and they allow you to brand the product with your own branding. This business is somewhat similar to the dropshipping model.
You may research the best suppliers that offer private-label products and finalize with them how you would like to brand your products.
3. Print-on-Demand (POD) Clothing Store
As the name suggests, the print-on-demand business model is when you print a product based on the demand (order). Again, it has the same benefit as a dropshipping business model when it comes to managing inventory.
There are many popular POD providers/suppliers such as Printful, Printify, SPOD, etc. You can integrate their platform with your eCommerce platform and automate the order fulfillment and shipment processes.
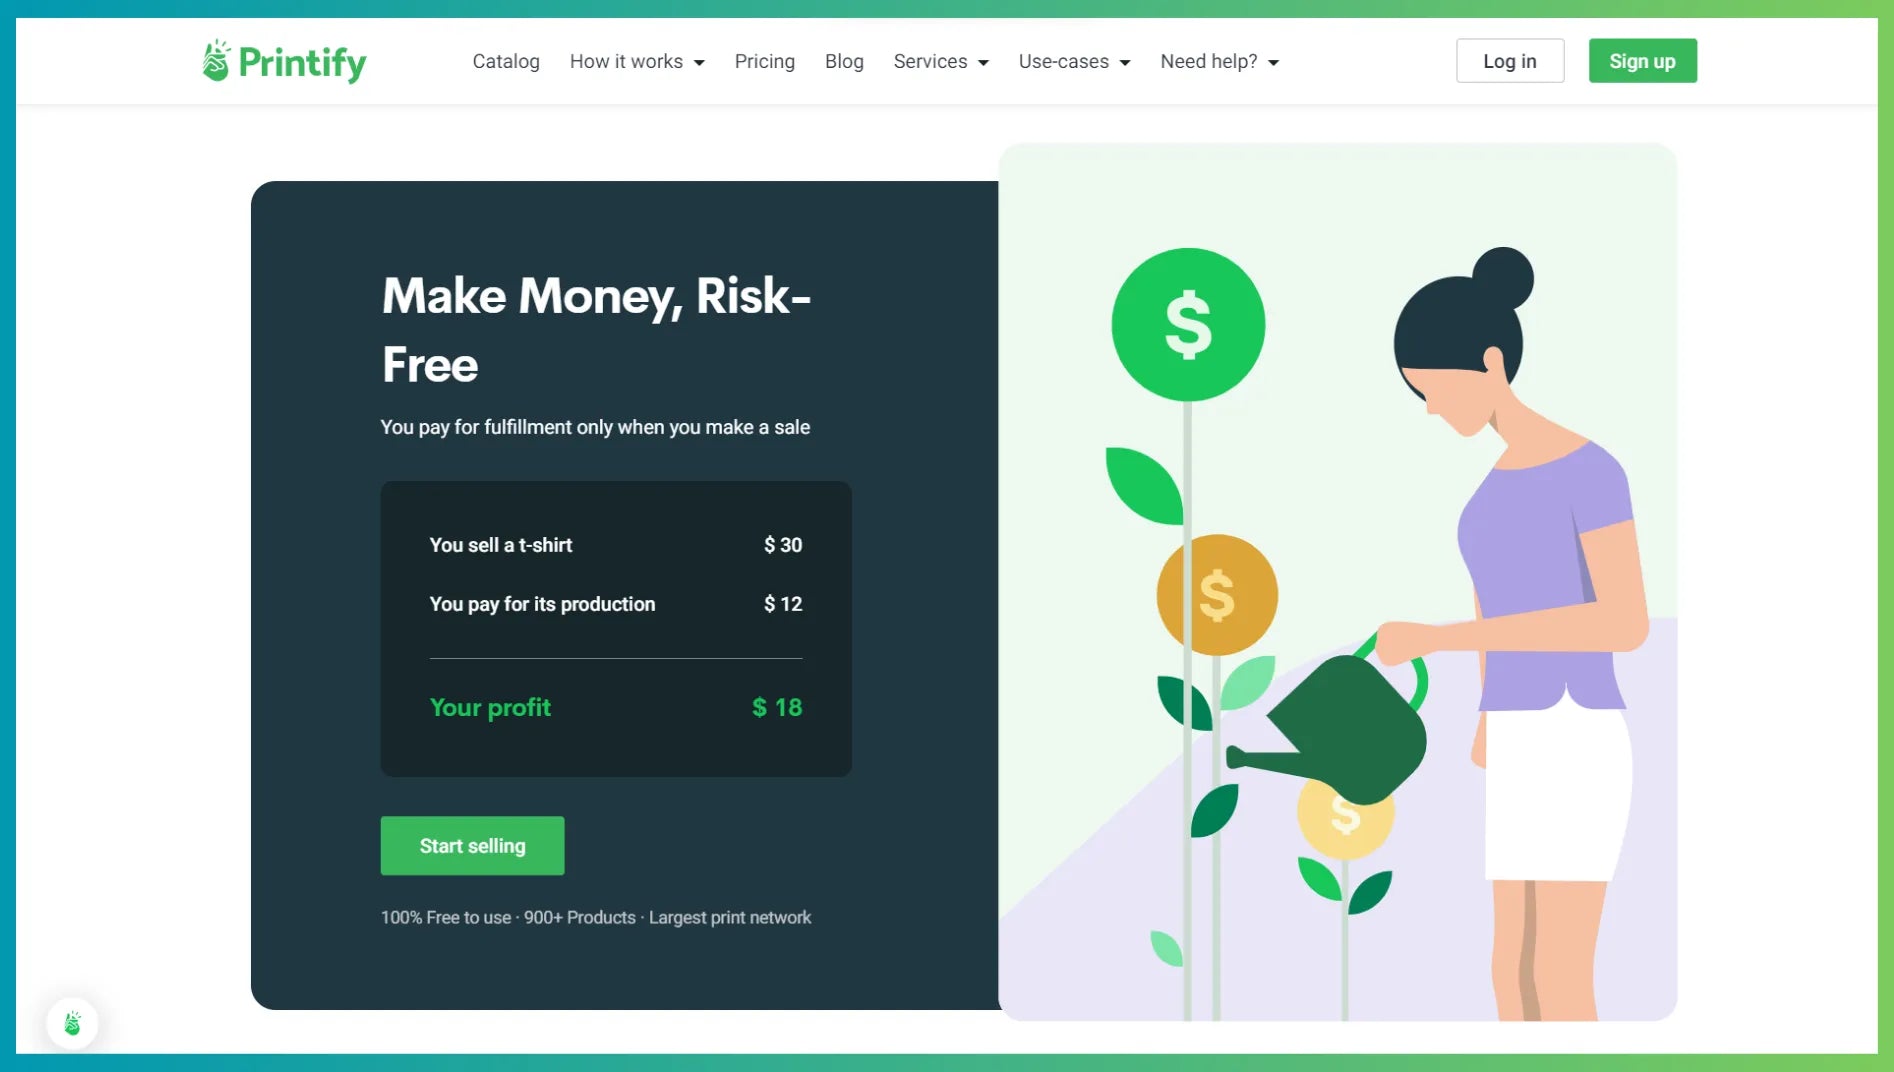
Printify is one among many popular POD providers. It’s mainly known for providing high profit margins to merchants.
Pro tip: If you’re planning to start a POD store, it’s better to choose a specific niche and create designs related to that niche. That way, you can build your own community around the niche and make them your loyal customers. For example, you can create print designs for clothing products that are specifically designed for moms or dads.
Learn more: 10 Top Shopify Print-on-Demand Store Examples: Inspiring Success Stories
4. Subscription Box Business
Subscription box business is a great business model to earn recurring revenue from your eCommerce business. The idea is to find and sell products that customers need repeatedly.
For example, personal care products, food items, stationary products, pet supplies, etc.
Learn more: How to Start a Shopify Subscription Box Business in 5 Easy Steps
5. Handmade Products
Handmade products have their own charm and customer base. Many customers appreciate artistic and creative work, and thus, they love to buy handmade products.
Pro tip: You can perform research on Etsy to find which handmade products are selling best. Etsy is a marketplace that encourages sellers to sell handmade products, and thus, Etsy has created a huge customer base in this niche. However, you can use this platform to validate your ideas.
6. Service-Based Business
If you’re skilled in any specific area and do not have a huge budget to start a product-based business, you can start selling your services.
Learn more: Shopify for Services? Yes! Here’s How.
7. Jewelry Store
Selling affordable jewelry items is one of the best ideas to earn good profit margins. You can even source jewelry items from print-on-demand jewelry suppliers and personalize those products.
8. Outdoor and Camping Products
If you’re a camping enthusiast, you can turn your passion into business. Also, it would make selling those products much easier as you know what’s needed by other camping enthusiasts.
9. Home & Kitchen Items
The idea of selling home and kitchen essentials gives you the opportunity to sell a wide range of products. For example, home decor items, furniture, table accessories, wall art, storage containers, platters, mugs, and the list goes on.
Learn more: 15 Top Home Decor Shopify Stores
10. Food Items
Selling food items is one of the evergreen business ideas because it’s never going to be out of demand. In fact, you can also combine your food store idea with the subscription box business model.
Final Thoughts on Building an eCommerce Business
When beginning your eCommerce journey, you’ll go through a lot of excitement, and sometimes, you may face some challenges as well. Join the communities of eCommerce entrepreneurs and it’ll help you a lot to learn and get guidance to resolve any issues.
Feel free to join our Facebook Community to learn from experts and other entrepreneurs—and share your journey as well as challenges. Our community has more than 5,000 members to share and discuss anything related to eCommerce, Shopify, or GemPages.
Also, our blog and newsletter will help you with useful resources, tips, ideas, and best practices to grow and scale our eCommerce business.
Get started with your Shopify eCommerce store now!
We wish you all the best!
FAQs on How to Make Your Own Website


